Posted on Leave a comment

How Does Snow Buildup Affect Your Roof and What Can You Do About It?

Introduction

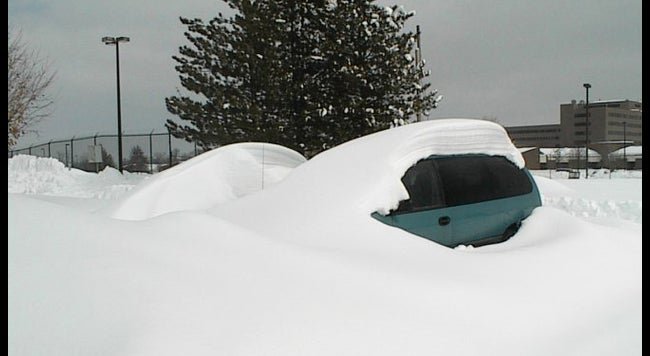
Have you ever wondered just how much snow buildup on your roof can really impact your home? It might seem harmless at first, but even a few inches of snow can add a surprising amount of weight, putting significant strain on your roof. If left unchecked, this accumulation can lead to costly damage and even structural problems. Roofs with shallow pitches are particularly vulnerable, as the snow has nowhere to go and just keeps piling up. So, what can you do to prevent this winter hazard from turning into a nightmare?

As temperatures drop and winter settles in, it’s crucial to give your roof the attention it needs. Regular maintenance and timely snow removal can make all the difference in protecting your home. This blog is here to help you understand the risks of snow buildup on your roof and provide practical tips to keep your roof—and your home—safe all winter long. Don’t wait until it’s too late; a little preparation now can save you from big headaches later.

Understanding Snow Buildup on Roofs

What is Roof Snow Buildup?

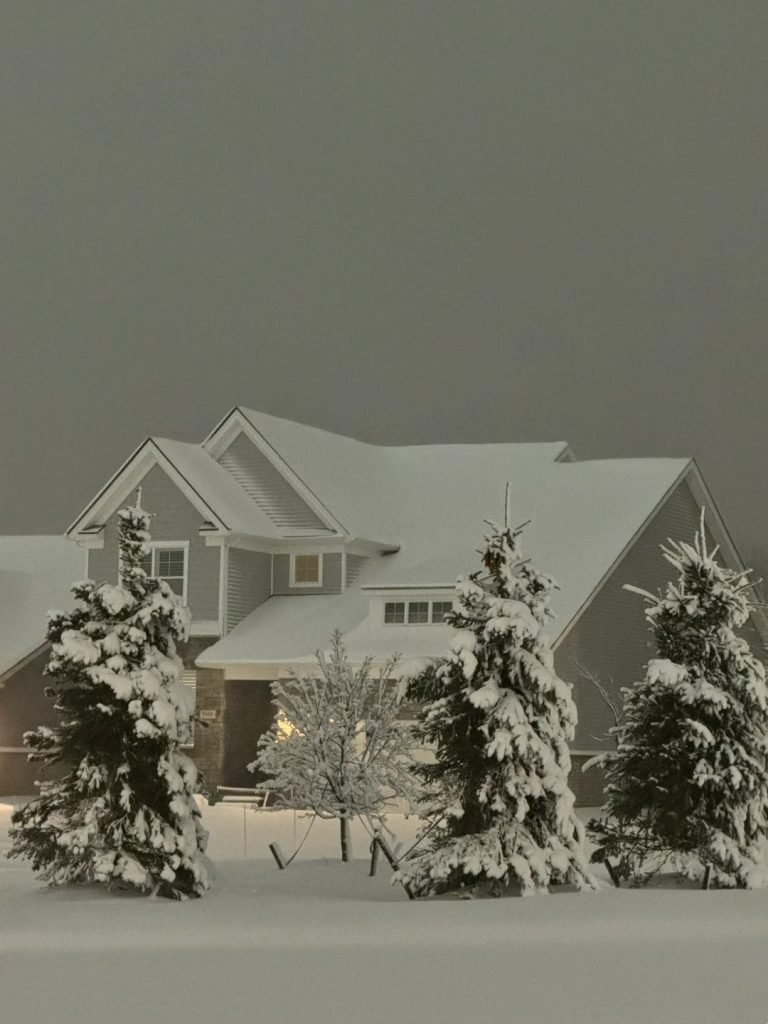
Roof snow buildup happens when snow accumulates on your roof and stays there for an extended period. It might not seem like a big deal at first, but even a few inches of snow can add up to a heavy load, putting extra stress on your roof. This buildup can lead to all sorts of issues, from ice dams to roof leaks, and even structural damage if the snow isn’t properly managed.

So, what’s the big deal about snow buildup? Well, the weight of snow can vary, and the older it gets, the more compact and heavier it becomes. For instance, fresh snow can weigh around 20 pounds per cubic foot, while older, packed snow can weigh up to 40 pounds per cubic foot! This means that the longer you let snow sit on your roof, the heavier and more dangerous it becomes.

❄️Want to know how to figure out how much snow weighs on your roof? Check out this blog post on the Snow Load Calculator!

How Roof Snow Builds Up

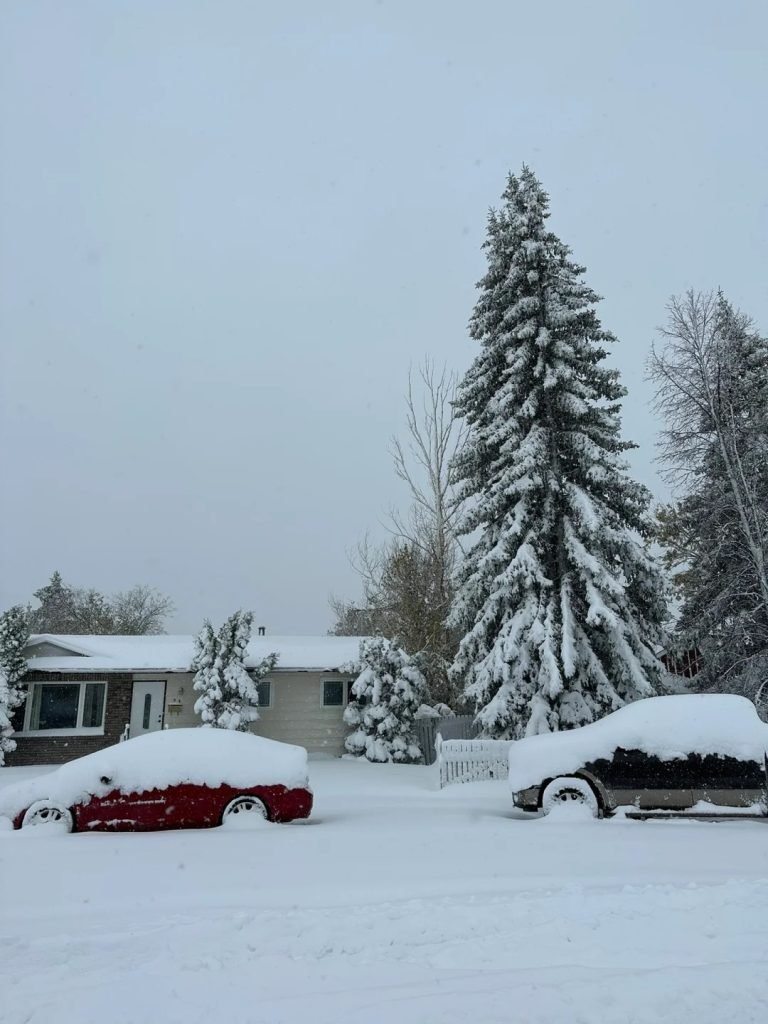
Roof snow buildup occurs when snow falls on your roof and isn’t removed or melted away. It happens most often in areas with heavy snowfall and cold temperatures where snow doesn’t melt quickly. As more snow falls, the layers pile up, and over time, the snow can become compacted and even turn into ice. This buildup can create significant weight on your roof and lead to various problems if not addressed.

Here’s the deal: snow falls, it sticks to your roof, and if it’s not taken care of, it starts to pile up. Add in some cold weather, and that snow isn’t going anywhere fast. This is particularly true for roofs that aren’t steep enough to let the snow slide off naturally. So, the snow just sits there, getting heavier and more compacted, increasing the risk of damage to your home.

Factors Contributing to Roof Snow Buildup

Several factors can contribute to snow buildup on your roof, including:

  • Climate: Regions with frequent snowfall and freezing temperatures are more prone to roof snow buildup. If you live in an area where snowstorms are common, your roof is likely to see significant snow accumulation during the winter months.
  • Roof Design: The pitch and material of your roof play a significant role in how snow accumulates.
    • Low-pitched roofs tend to hold more snow because they don’t have enough slope for the snow to slide off naturally.
    • Steeper roofs are less prone to snow buildup because the snow tends to slide off more easily. However, if snow does accumulate on a steep roof, it can create dangerous avalanches of snow and ice.
    • Roofing materials like metal or slate can also impact snow accumulation, as these surfaces tend to be smoother, allowing snow to slide off more easily compared to rougher surfaces like asphalt shingles.
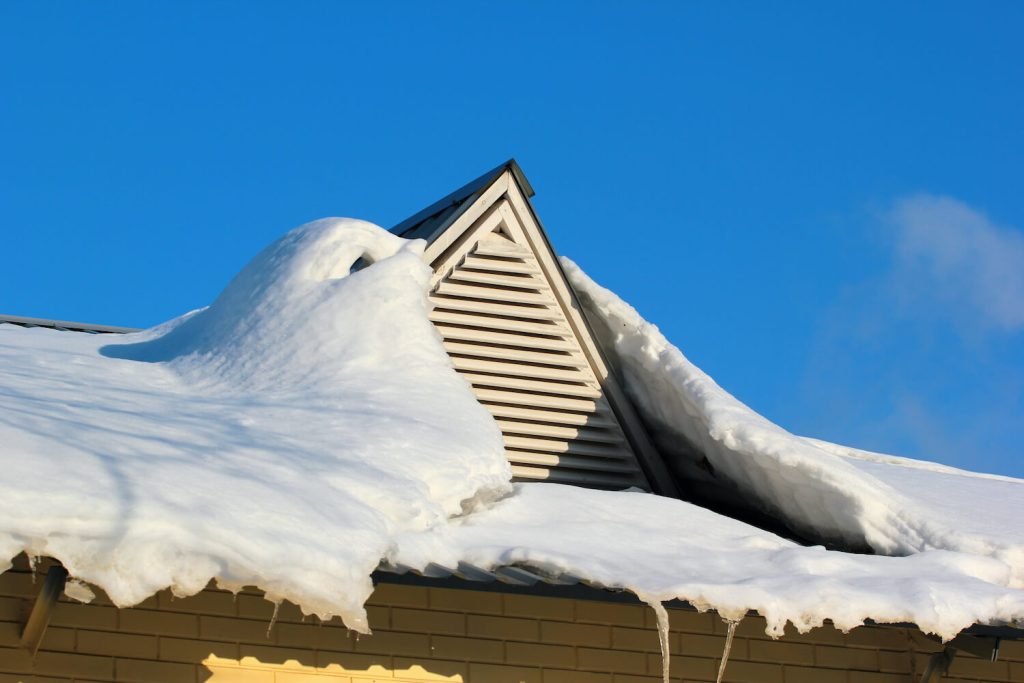
  • Obstructions: Things like chimneys, skylights, and vents can obstruct the snow’s natural flow off the roof, leading to localized buildup around these features. This can cause uneven distribution of weight and increase the risk of damage in specific areas of your roof.
  • Sun Exposure: Roofs that get less sunlight, either due to orientation or shade from trees, are more likely to retain snow longer. The sun can help to melt snow and ice, reducing the overall buildup on your roof.

Understanding these factors is crucial for homeowners looking to prevent roof snow buildup and its associated risks. By recognizing the conditions that contribute to this issue, you can take proactive steps to protect your home during the winter months.

The Impact of Snow Buildup on Your Roof

Additional Weight and Structural Strain

One of the biggest concerns with snow buildup is the additional weight it adds to your roof. Snow might look light and fluffy when it’s falling, but when it piles up, it can become incredibly heavy. The weight of the snow depends on several factors, including its moisture content and how long it has been sitting on your roof.

Weight of Snow: Fresh vs. Compacted

Fresh snow typically weighs around 20 pounds per cubic foot, but as it compacts, the weight can double to about 40 pounds per cubic foot or more. This is because fresh snow is mostly air, but as it sits and begins to settle, the air is squeezed out, and the snow becomes denser. If the snow melts slightly and then refreezes, it becomes even heavier, adding to the strain on your roof. Imagine your roof covered in a thick blanket of compacted snow. That’s a lot of weight pressing down on your roof, and if the structure isn’t built to handle it, it can lead to serious issues. Over time, this kind of weight can cause your roof to sag, warp, or even collapse in extreme cases.

Effects on Roof Structure Over Time 

The longer snow sits on your roof, the more pressure it exerts on the underlying structure. This can cause gradual wear and tear, leading to problems like cracked beams, weakened trusses, and other structural damage. If snow is left to accumulate year after year, the damage can build up, potentially leading to costly repairs or even a full roof replacement. The worst-case scenario is a roof collapse, which can be dangerous and expensive to fix. Regularly clearing snow from your roof can prevent these issues, but it’s also important to ensure your roof is designed to handle the weight of snow if you live in a region that experiences heavy snowfall.

Roof Pitch and Snow Accumulation

The pitch of your roof plays a significant role in how snow accumulates and how easily it can be removed.

Explanation of Roof Pitch

Roof pitch refers to the steepness of your roof, which is measured by the number of inches it rises vertically for every 12 inches it extends horizontally. For example, a roof with a 6:12 pitch rises 6 inches for every 12 inches of horizontal distance. The steeper the pitch, the more likely snow will slide off naturally rather than accumulate on the surface.

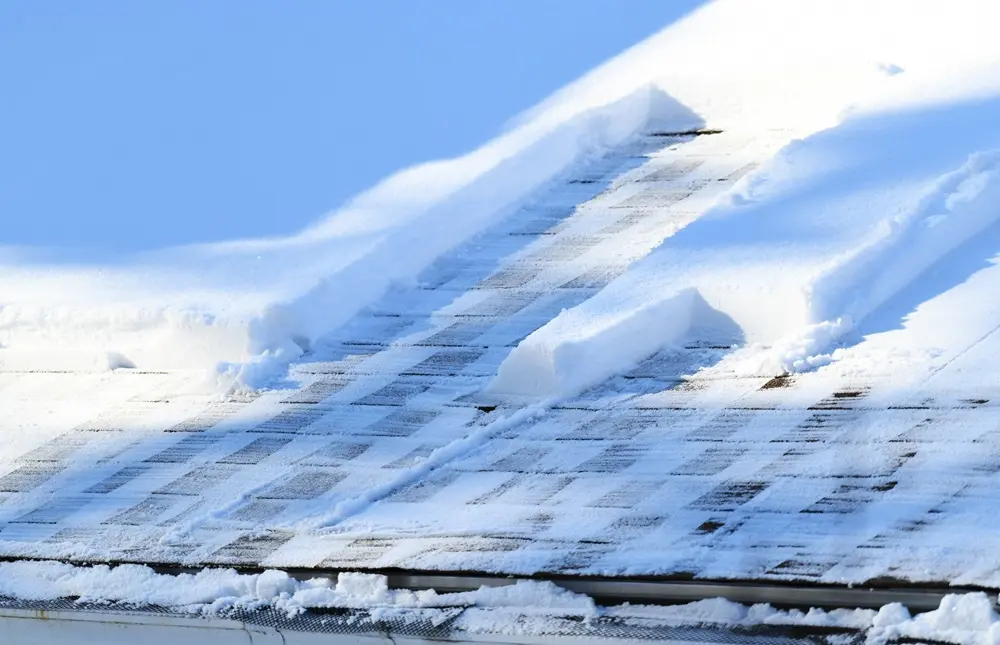
How Different Pitches Affect Snow Accumulation

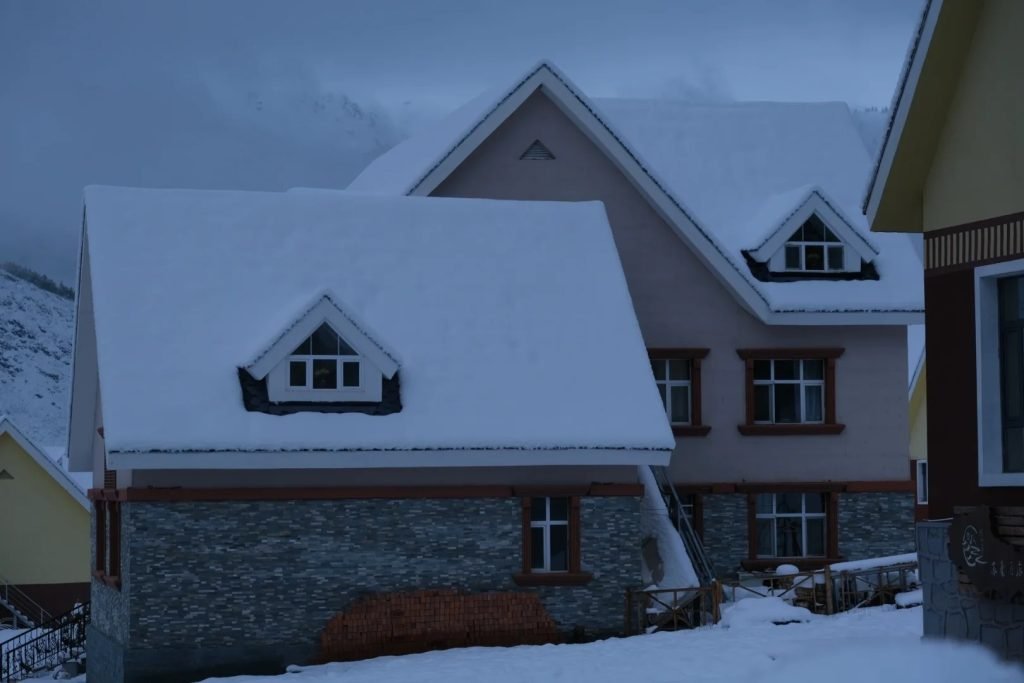
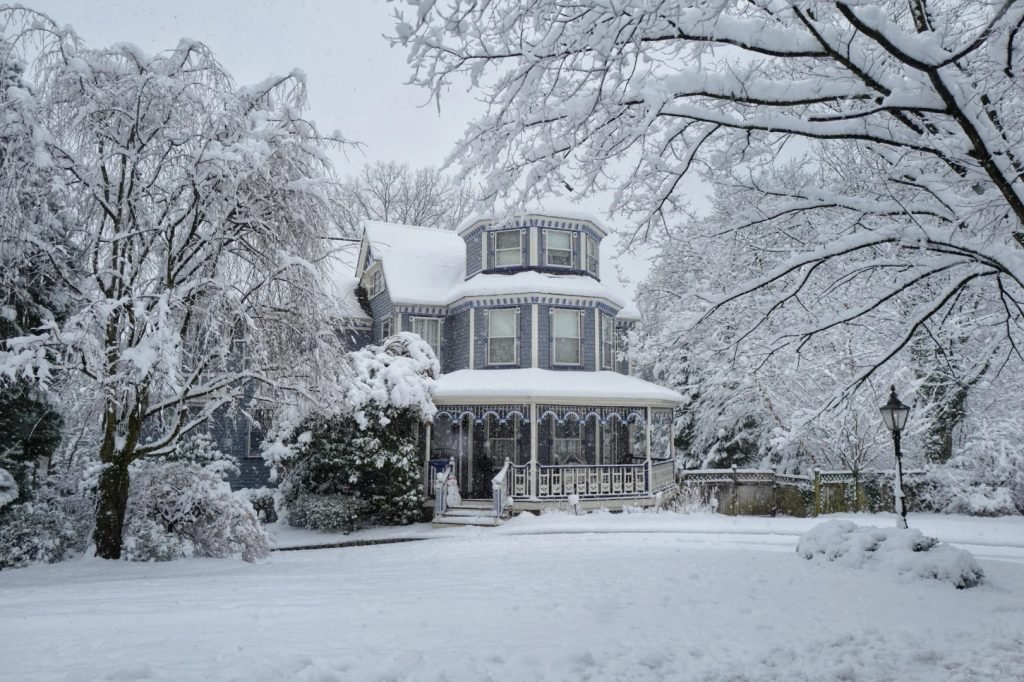
Roofs with a shallow pitch are more prone to snow buildup because the snow has a flatter surface to cling to. These types of roofs are common in areas that don’t typically see a lot of snow, but in regions where snowfall is heavy, they can lead to significant problems. On the other hand, roofs with a steeper pitch allow gravity to do the work, helping snow to slide off before it has a chance to accumulate and become heavy. However, steep roofs aren’t without their own risks. When snow slides off a steep roof, it can cause a mini avalanche, which could be dangerous for anyone below or could damage property like cars parked nearby.

Ideal Snowy Region Roof Pitches

For areas that experience heavy snowfall, a roof pitch of at least 6:12 is often recommended, with steeper pitches offering better protection. A steeper roof pitch not only helps prevent snow buildup but also minimizes the risk of ice dams, which occur when melting snow refreezes at the edges of the roof, creating a barrier that prevents further melting snow from draining off. In regions with particularly harsh winters, it might be worth considering a roof pitch as steep as 8:12 or more. This allows the snow to shed more quickly and reduces the likelihood of excessive buildup.

Understanding the relationship between roof pitch and snow accumulation is essential in preventing winter damage to your home. By ensuring your roof has the right pitch for your climate, you can reduce the risks associated with snow buildup and keep your home safe and sound throughout the winter months.

Preventing Snow Damage: Key Strategies

Regular Snow Removal

To prevent snow from causing damage to your roof starts with regular removal. While it might seem like a hassle, keeping your roof clear of snow is essential for maintaining its integrity throughout the winter.

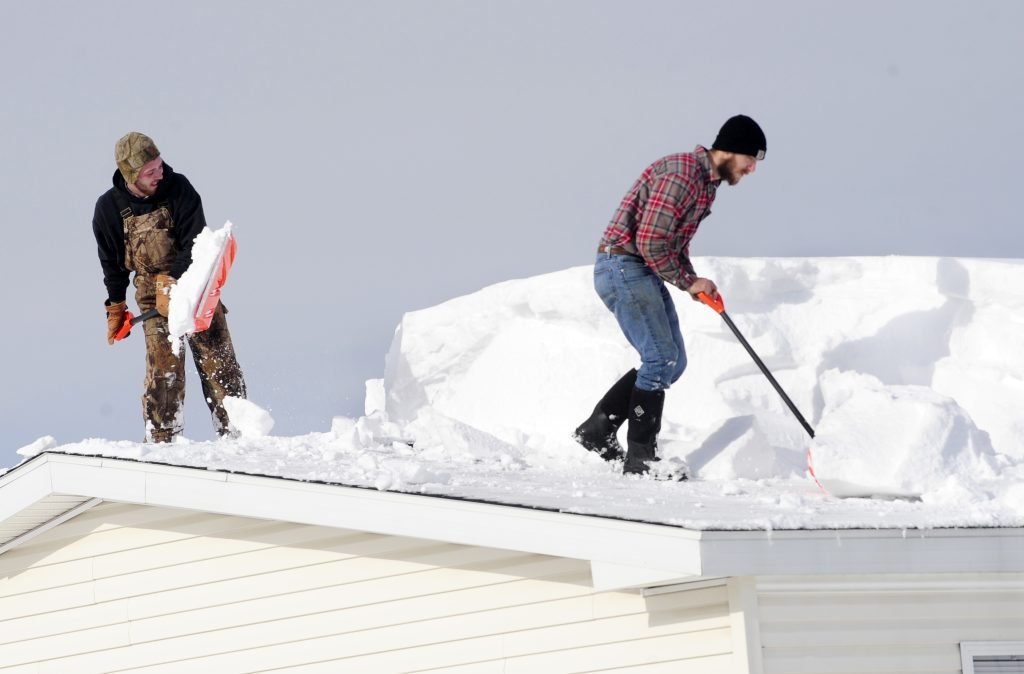
When and How Often to Remove Snow

Timing is everything when it comes to removing snow from your roof. Ideally, you should aim to clear snow after every significant snowfall, especially when the snow accumulation reaches around 6 inches. Waiting too long allows the snow to compact and harden, making it more difficult to remove and increasing the strain on your roof.How often you need to clear snow depends on your local weather patterns. In areas with frequent snowfall, you might find yourself shoveling every few days. It’s better to clear snow more often and deal with smaller amounts than to let it build up.

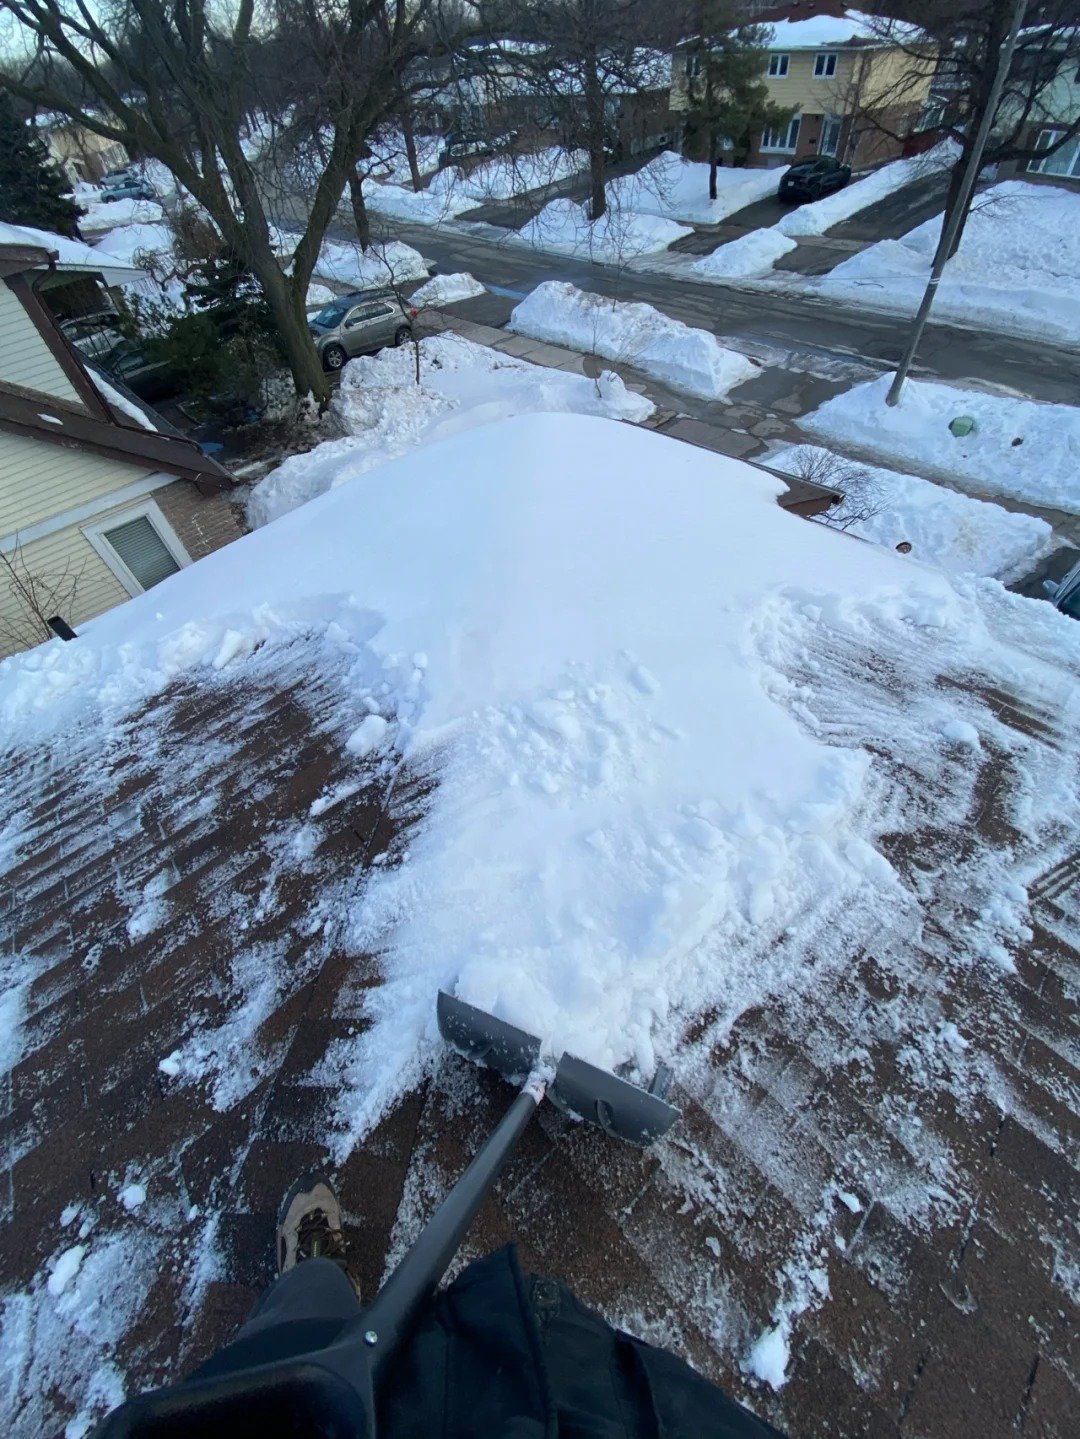
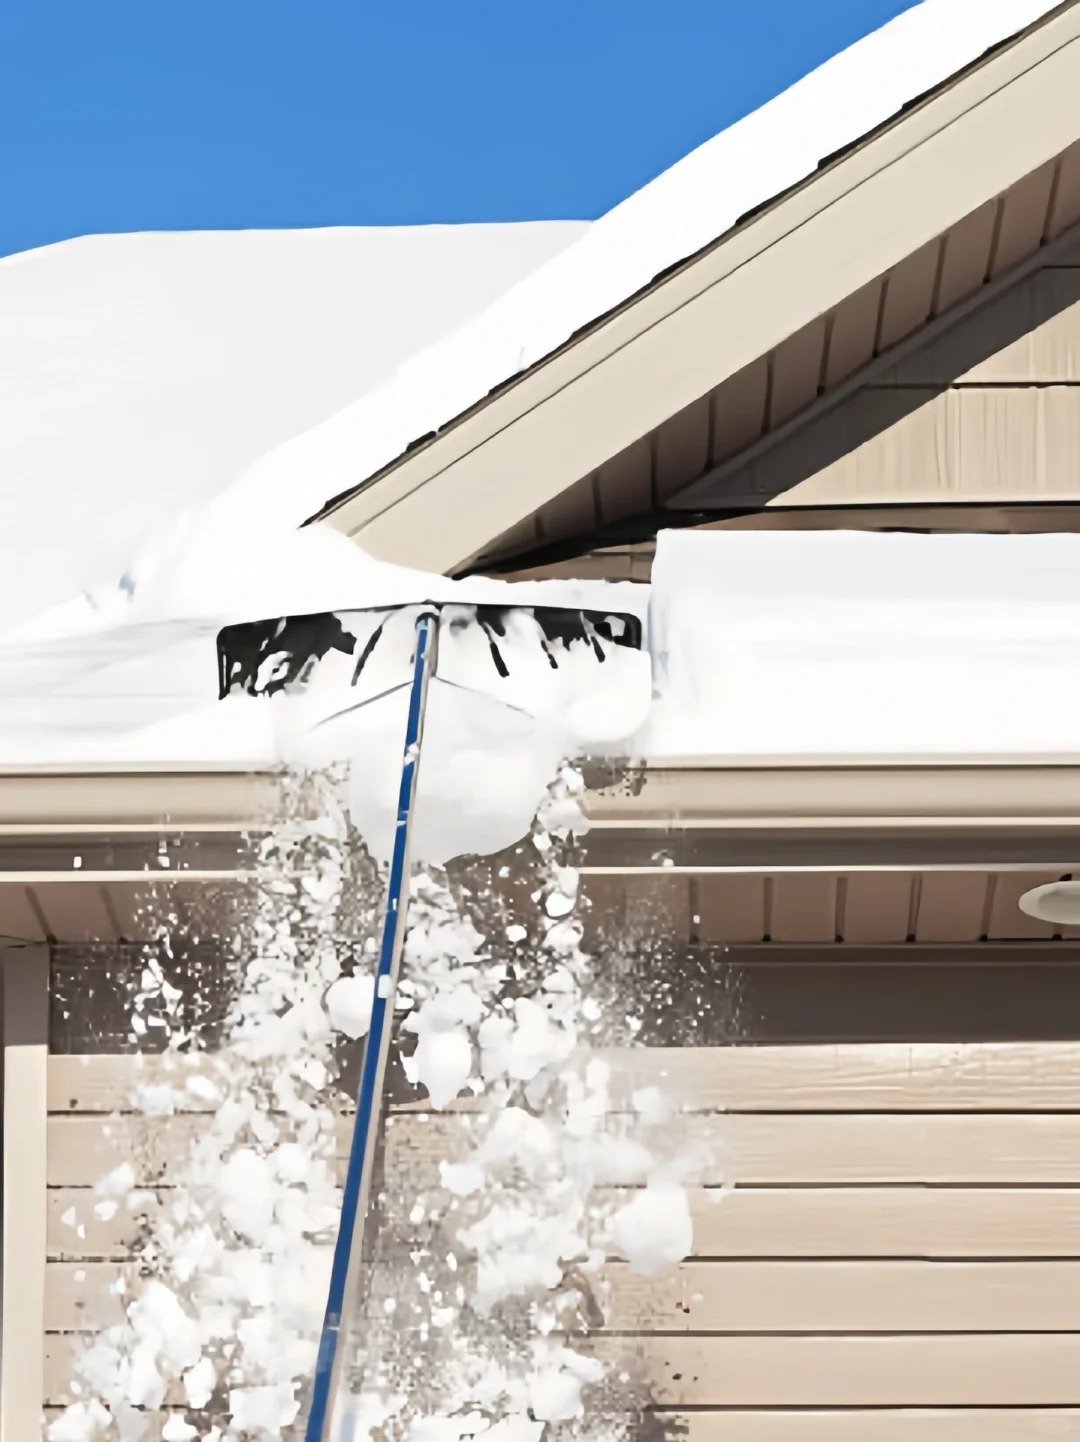
Tools for Snow Removal: Roof Rakes, Snow Shovels, etc.

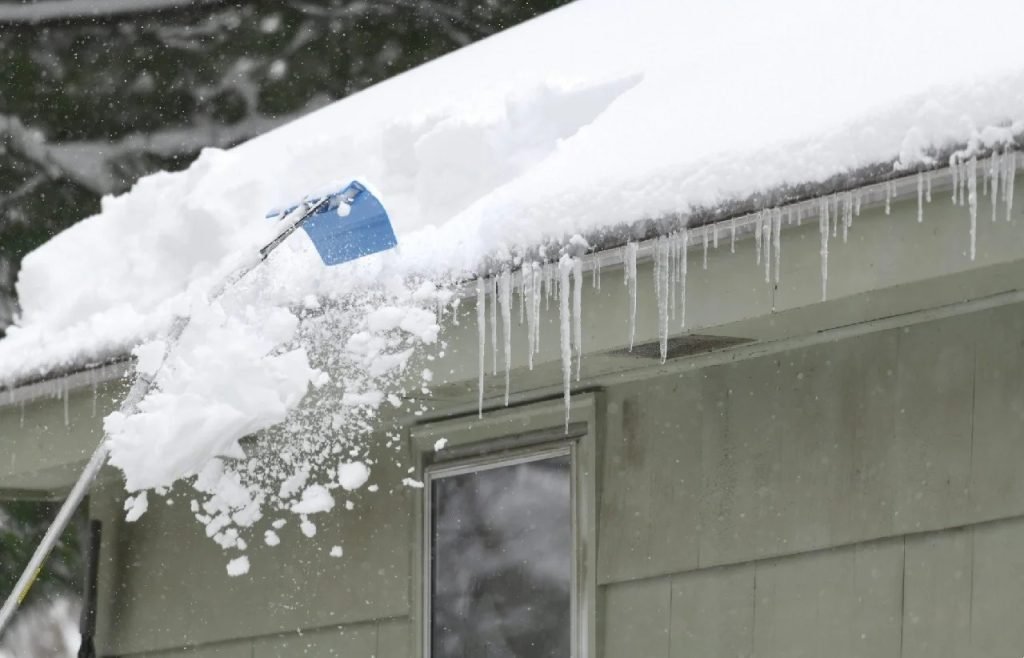
Having the right tools can make all the difference. A roof rake is your best friend when it comes to removing snow from your roof. These rakes have long handles that allow you to reach up to your roof while standing safely on the ground. They’re designed to pull snow off the roof without causing damage to the shingles.If the snow is light and fluffy, you might be able to use a snow shovel from the ground to knock it off. However, be cautious not to climb onto your roof with a shovel, as this can be extremely dangerous. There are also snow removal services you can hire if the job is too big or risky for you to handle alone.

Safety Tips for Snow Removal

Safety should always be a priority when removing snow from your roof. Here are some tips:

  • Avoid over-reaching: Always move your ladder instead of stretching too far. Remember, snow removal is crucial, but it’s not worth risking your safety.
  • Use the right equipment: A roof rake with rollers can help prevent damage to shingles.
  • Work with a partner: Having someone spot you can prevent accidents.
  • Watch for ice: Ice can be slippery and dangerous; ensure you have good traction if you’re on the roof.

Ice Dams: Prevention and Management

Ice dams are another major issue that can arise from snow buildup, and they can lead to significant damage if not addressed properly.

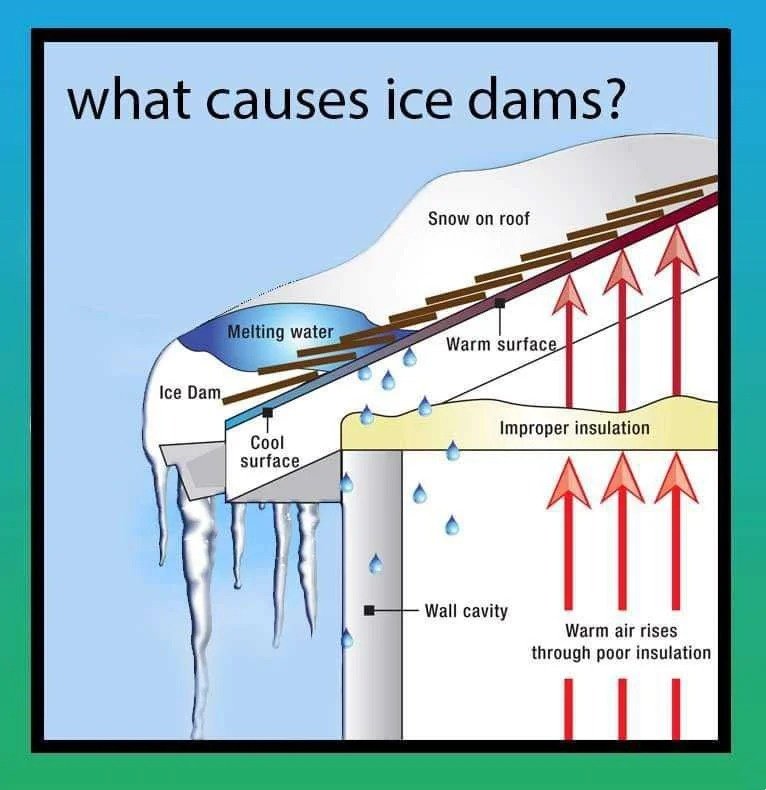
What Are Ice Dams and How Do They Form?

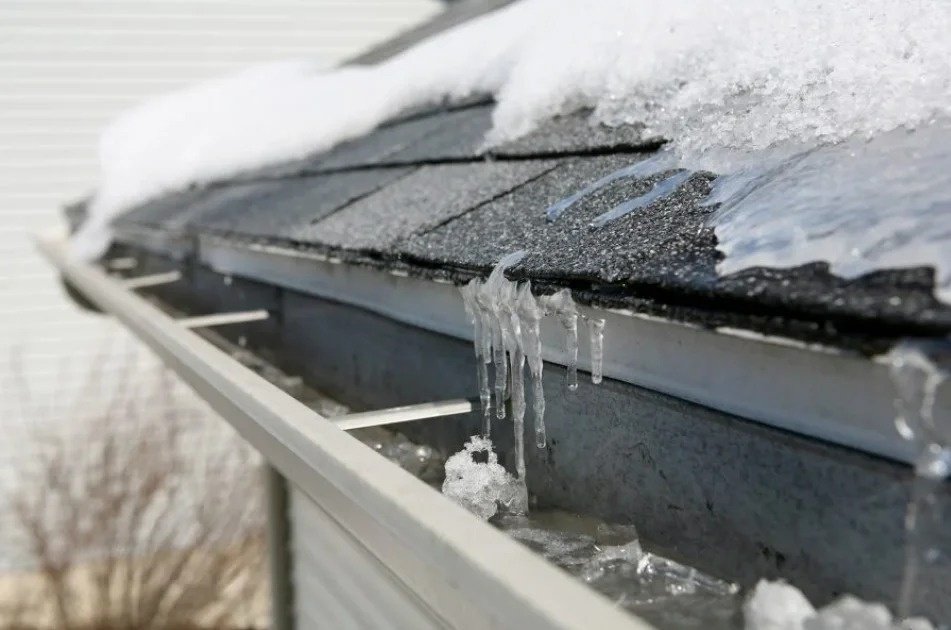
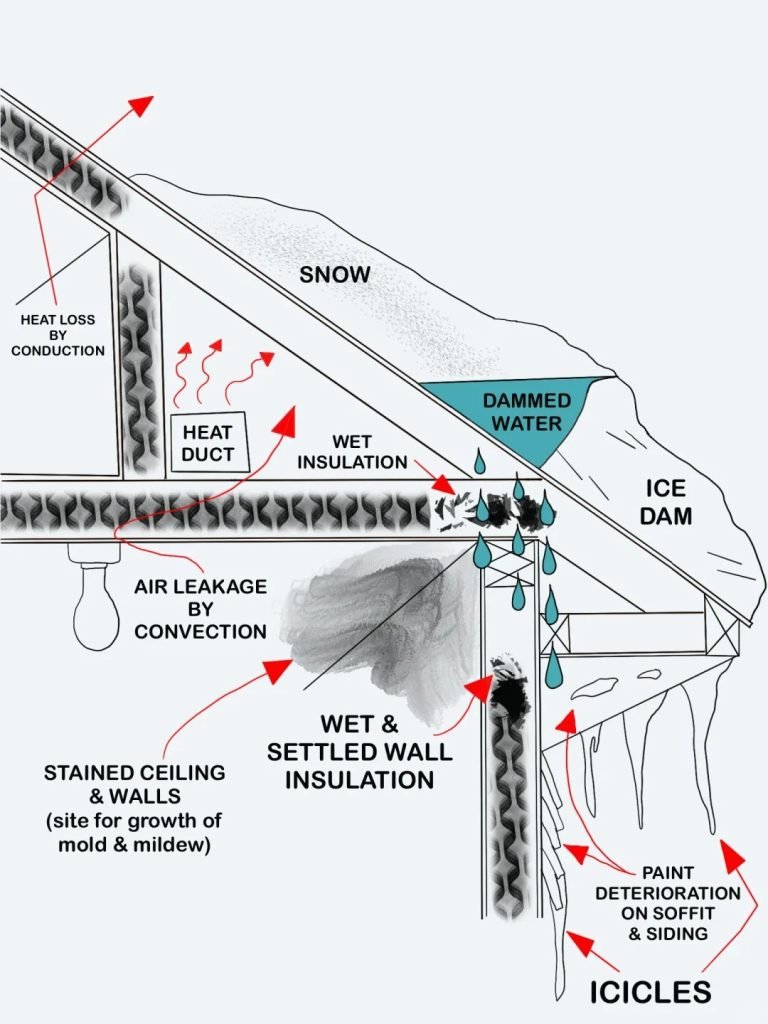
Ice dams form when the snow on your roof melts and then refreezes at the roof’s edge, typically over the eaves. This happens because the warm air from your home escapes through the roof, melting the snow. As the water flows down the roof and reaches the colder eaves, it refreezes, forming an ice dam. This dam traps more water behind it, which can then seep under the shingles and into your home, causing water damage.

❄️Want to learn more about how to prevent ice dams at bay? Using a roof rake safely is key! Check this out.

Impact of Ice Dams on Roofs and Gutters

Ice dams are not only bad for your roof; they can also wreak havoc on your gutters. The weight of the ice can cause gutters to sag or even pull away from the house, leading to costly repairs. Moreover, the water trapped by the ice dam can find its way into your roof’s structure, leading to leaks, mold growth, and damage to insulation and walls.

Preventive Measures: Heating Cables, Insulation, Ventilation

Preventing ice dams is all about managing the heat loss from your home and ensuring proper drainage on your roof.

  • Heating Cables: These cables can be installed along the edge of your roof to prevent the formation of ice dams. They work by keeping the roof edge just warm enough to allow snow to melt and drain away rather than refreeze.
  • Insulation: Improving your attic insulation helps to keep warm air from escaping through the roof, which in turn keeps the roof surface cold and prevents snow from melting unevenly.
  • Ventilation: Proper attic ventilation allows cold air to circulate, reducing the temperature difference between the roof’s surface and the outside air. This helps to prevent the melting and refreezing cycle that causes ice dams.

Improving Attic Insulation

Attic insulation plays a crucial role in preventing snow-related roof damage. It helps maintain a consistent temperature across your roof, reducing the risk of ice dams and excessive snowmelt.

How Insulation Affects Roof Temperature and Snow Melt

When your attic is poorly insulated, warm air from your home rises and escapes through the roof, causing the snow on top to melt. This can lead to ice dams and other issues. By improving insulation, you ensure that the attic remains closer to the outside temperature, preventing uneven snowmelt and reduce the risk of ice dam formation.

The most commonly used materials for attic insulation include fiberglass, cellulose, and spray foam. Each has its benefits:

  • Fiberglass: Easy to install and cost-effective, fiberglass insulation comes in batts or loose-fill forms. It’s great for covering large areas.
  • Cellulose: Made from recycled paper, cellulose insulation is eco-friendly and provides good coverage, especially in hard-to-reach areas.
  • Spray Foam: This insulation creates an airtight seal and provides excellent R-value (thermal resistance), making it ideal for homes in very cold climates.

When insulating your attic, make sure to seal any air leaks and consider adding a vapor barrier to prevent moisture from getting trapped in the insulation. This helps maintain your home’s energy efficiency and prevent condensation that can lead to mold growth.

Installing Heating Cables

Heating cables are a proactive way to prevent snow buildup and ice dams, providing a practical solution for maintaining your roof’s integrity during the winter.

How Heating Cables Work

Heating cables, also known as heat tape, are designed to be installed along the edges of your roof and in gutters. They work by gently warming these areas, preventing snow from accumulating and melting snow from refreezing. The cables are plugged into an outlet and can be controlled by a thermostat to turn on only when temperatures drop below freezing.

Where and How to Install Heating Cables

Heating cables should be installed in a zigzag pattern along the roof’s edge, where ice dams are most likely to form. They can also be placed in gutters and downspouts to ensure that water flows freely and doesn’t freeze inside. Installation is relatively straightforward but should be done with care to ensure the cables are securely fastened and connected to a safe power source. It’s often a good idea to have a professional handle the installation to avoid any potential electrical hazards.

Benefits and Considerations

The main benefit of heating cables is their ability to prevent ice dams and the associated damage to your roof and gutters. They are a relatively low-cost solution compared to repairing the damage caused by ice dams. However, there are some considerations to keep in mind:

  • Energy Consumption: Heating cables do consume electricity, so it’s important to use them efficiently to avoid unnecessary costs.
  • Maintenance: Regularly check the cables for wear and tear, especially at the beginning and end of the winter season.
  • Effectiveness: While heating cables are effective, they work best when combined with other preventive measures like proper insulation and ventilation.

By implementing these key strategies, you can significantly reduce the risk of snow-related roof damage, ensuring your home stays safe and sound throughout the winter. Proactive measures such as regular snow removal, managing ice dams, improving insulation, and installing heating cables can help protect your roof and extend its lifespan.

Winter can be tough on roofs, and knowing the signs of snow-related damage can save you from costly repairs down the line. Here’s what to look out for:

Structural Warning Signs

The weight of snow on your roof can cause serious structural issues if not addressed promptly. Here are some key indicators that your roof may be under strain:

Creaking, Groaning, and Other Unusual Noises

If you hear creaking, groaning, or other unusual sounds coming from above, don’t ignore them. These noises can be a sign that your roof is struggling to bear the weight of the snow. It’s important to take these sounds seriously, as they can indicate that your roof is nearing its load limit, and immediate action is necessary.

Visible Sagging or Deformation in Roof Structure

Visible sagging or deformation in your roof is another red flag. This can occur when the snow’s weight causes the roof to bow under pressure, leading to a dip or curve where there should be a straight line. Check for any areas that look uneven or seem to be sagging – this could indicate a severe issue that needs professional attention.

Water Damage Indicators

Water damage is a common consequence of snow buildup on roofs, especially if ice dams are present. Identifying the signs of water damage early can help prevent more extensive problems.

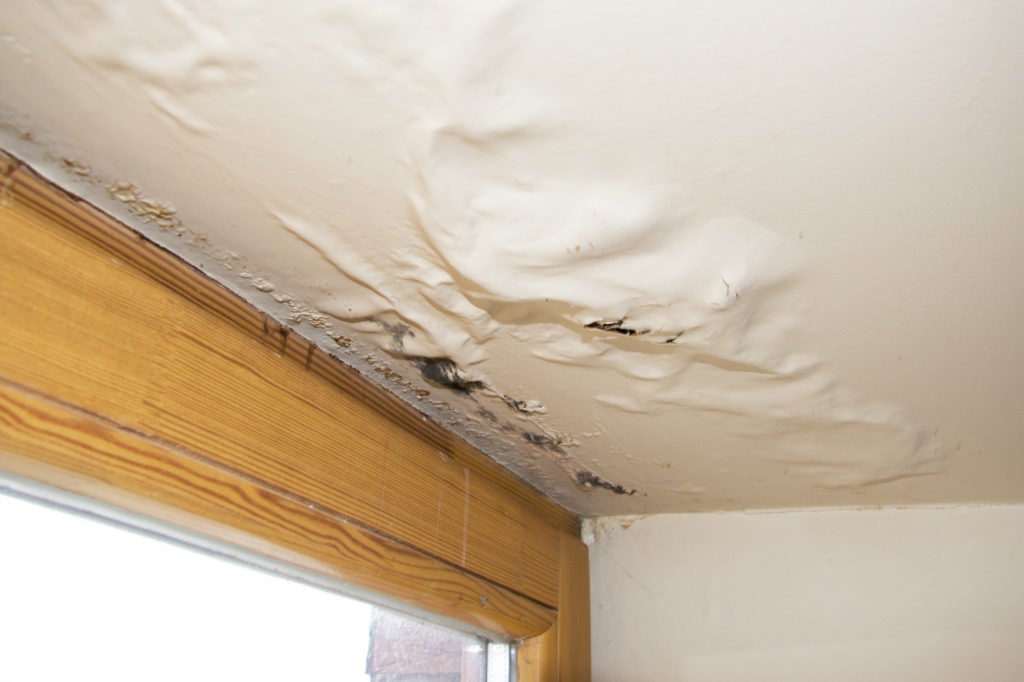
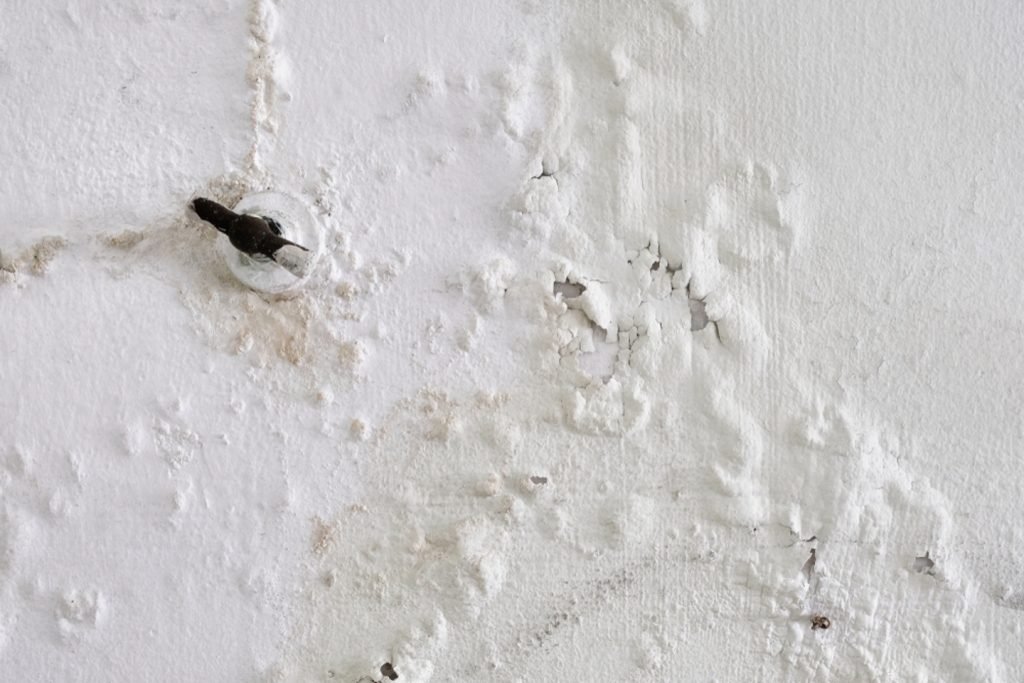
Water Spots, Mold Growth, and Ceiling Stains

Keep an eye out for water spots, mold growth, or stains on your ceiling. These are clear indicators that moisture has seeped through your roof, possibly due to snowmelt or ice dams. Water spots often start as small, discolored patches but can spread if not addressed, leading to mold growth and further structural damage.

How to Identify and Address Water Damage Early

Ice Dams and Roof Leaks

Early identification of water damage can save you a lot of trouble. Regularly inspect your ceilings and attic for any signs of moisture or discoloration. If you spot any, act quickly by drying out the affected area and sealing any leaks. It’s also wise to call a professional to assess the extent of the damage and ensure that the root cause is addressed.

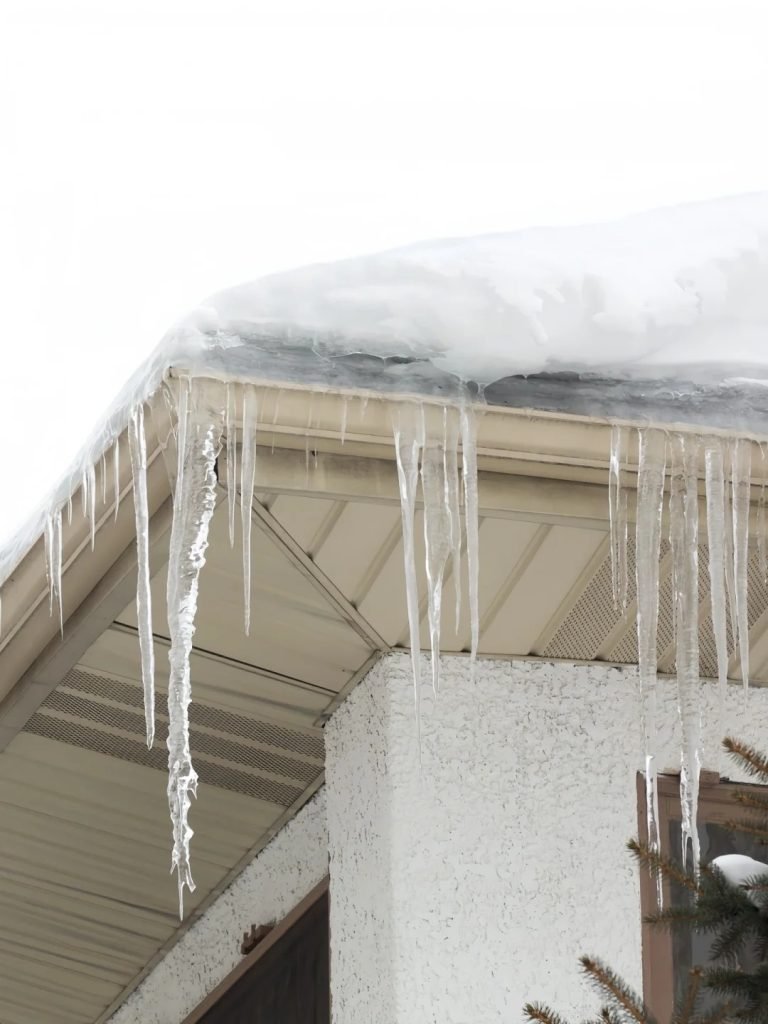
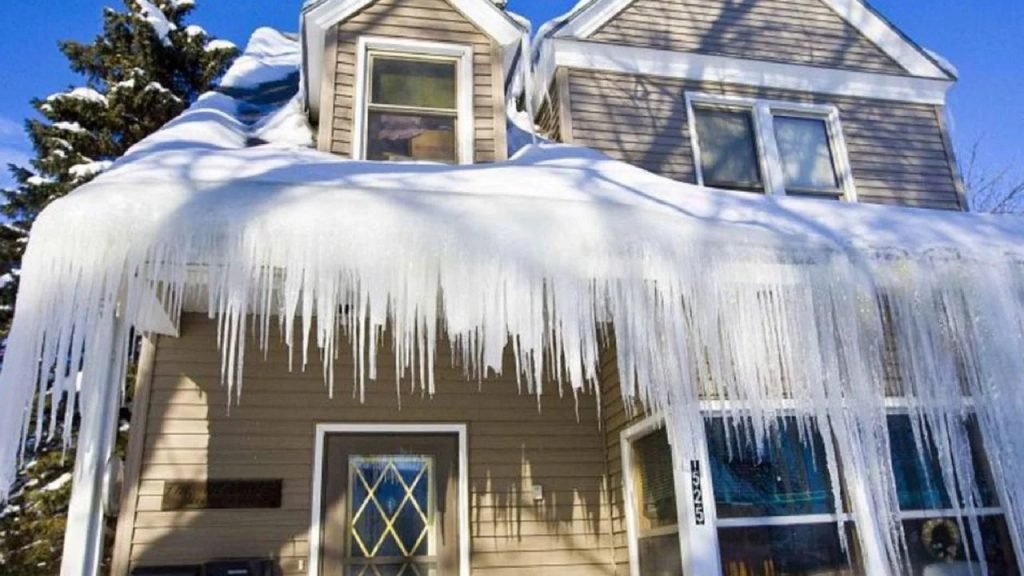
Recognizing the Signs of Ice Dams

The first sign of an ice dam is usually a ridge of ice along the edge of your roof, accompanied by icicles hanging from the eaves. While icicles can look pretty, they’re often a sign that an ice dam is forming. Inside your home, you might notice water dripping from the ceiling or down the walls, particularly near exterior walls, as the trapped water from the ice dam has nowhere else to go.

Immediate Steps to Take When You Notice Roof Leaks

If you notice a roof leak, especially during or after heavy snowfall, it’s crucial to act immediately. Move any valuables away from the leaking area and place a bucket to catch the dripping water. Try to locate the source of the leak from inside your attic if possible. Temporarily stop the leak by placing a tarp over the area or using a roof rake to carefully remove snow. Then, contact a professional to repair the leak and address any ice dams or other underlying issues.

Staying vigilant about these warning signs and taking prompt action can help protect your home from the damaging effects of snow buildup on your roof. Regular inspections and maintenance are key to ensuring that your roof remains in good shape throughout the winter months.

Emergency Response to Snow Buildup

Snow buildup on your roof can lead to serious issues, and knowing when to seek professional help is crucial. Here’s how to respond in emergencies and handle snow-related roof problems effectively.

When to Call a Professional

Knowing when to call a professional is key to preventing severe damage. Here’s a guide to help you decide:

Situations Requiring Professional Roofers

If you notice signs of significant snow accumulation, structural deformation, or persistent leaks, it’s time to call a roofing expert. A professional should be contacted if:

  • The snow buildup exceeds 6 inches or seems unusually dense.
  • You hear creaking or groaning sounds indicating possible structural strain.
  • There are visible signs of sagging or deformation in the roof structure.
  • Water damage is evident inside your home, especially if it’s persistent or worsening.

Choosing the Right Professional for the Job

When selecting a roofing contractor, ensure they are experienced in handling winter-related roof issues. Look for:

  • Credentials and Experience: Verify that they are licensed and have experience dealing with snow-related problems.
  • References and Reviews: Check reviews and ask for references to gauge their reliability.
  • Insurance: Confirm that they have insurance to cover any potential damage or accidents during the job.

Emergency Snow Removal Techniques

In emergencies, quick action can prevent further damage. Here’s how to handle snow buildup safely:

Handling Roof Collapse Risks

In extreme cases, the weight of the snow may pose a risk of roof collapse. Here’s what to do:

Identifying Signs of Imminent Collapse

Look for these warning signs that your roof might be at risk of collapsing:

  • Severe Sagging: Significant and visible sagging in the roof structure.
  • Cracks in Walls or Ceiling: Large cracks or separation in the walls or ceiling, especially around windows and doors.
  • Unusual Sounds: Persistent loud creaks or groans coming from the roof.

Steps to Take in Case of a Roof Collapse

If you suspect a risk of collapse or if it happens, follow these steps:

  • Evacuate the Area: Immediately get everyone out of the building to ensure safety.
  • Contact Emergency Services: Call local emergency services to get help and report the situation.
  • Avoid Entering the Building: Do not enter the building until it has been inspected and deemed safe by professionals.

Addressing snow buildup and related emergencies promptly can help protect your home and ensure safety during winter. Keep these guidelines in mind to effectively manage roof snow issues and minimize risks.

Frequently Asked Questions (FAQ)

The ideal roof pitch for handling snow is a steeper slope, typically between 30 and 45 degrees. Steeper roofs allow snow to slide off more easily, reducing the risk of excessive accumulation and potential damage. Roofs with a shallow pitch, on the other hand, are more prone to snow buildup, which can lead to increased stress and potential structural issues.

While there’s no exact amount that constitutes “too much,” most experts recommend clearing snow if it accumulates beyond 6 inches to prevent overloading your roof. The weight of snow can vary significantly based on its density—fresh, fluffy snow weighs less than compacted or wet snow. Regular inspections and timely removal are key to avoiding damage.

Using salt or other de-icing chemicals on your roof is generally not recommended. Salt can damage roofing materials and harm the environment. Instead, focus on safe snow removal techniques and consider installing heating cables designed specifically for melting snow and ice. These solutions are more effective and less damaging to your roof.

Ignoring snow buildup can lead to several serious issues, including roof collapse, leaks, and structural damage. As snow accumulates and compacts, it adds significant weight that can stress your roof. This can result in damage to roofing materials, ice dams forming, and water leaks into your home. Prompt snow removal and regular maintenance are crucial to preventing these risks and ensuring your roof’s longevity.

Conclusion

Snow buildup on your roof is more than just a winter inconvenience—it’s a potential hazard that can lead to serious damage if not properly managed. As we’ve discussed, snow accumulation can add significant weight and strain to your roof, especially if it’s compacted or if your roof has a low pitch. Regular snow removal, installing heating cables, and improving attic insulation are essential steps in preventing damage and ensuring your roof stays in top condition.

Don’t wait until you notice problems like leaks or unusual noises. Address snow buildup proactively to safeguard your home. Remember, “If you notice signs of significant snow accumulation, structural deformation, or persistent leaks, it’s time to call a roofing expert. These steps can now save you from costly repairs and ensure your home remains safe and cozy throughout the winter. For any issues or concerns, don’t hesitate to contact us at Lifetime Roofing. Your roof’s health is too important to overlook—act now and protect your home today!

Posted on Leave a comment

Impact of Major Blizzards on People and Homes (1950-Present)

Introduction: Major Blizzards

Have you ever wondered how a blizzard can wreak such havoc on our lives and homes? The destructive power of these massive snowstorms goes far beyond just the inconvenience of snow-covered streets. Over the past few decades, numerous blizzards have left a trail of devastation, significantly impacting society.

In this article, we will analyze some of the most significant blizzards in recent history, focusing on their damaging effects on people and homes. We’ll also discuss the critical role of snow removal tools, like roof rakes, in mitigating these impacts. Understanding these elements can help us better prepare for future storms and safeguard our properties.

Major Blizzard Events (1950-Present)

1950 Great Appalachian Storm

Event Overview: The Great Appalachian Storm, occurring in November 1950, was one of the most severe blizzards to hit the United States. It brought massive snow accumulations, high winds, and severe flooding.

Impact:

  • Casualties: The storm resulted in 160 deaths.
  • Property Damage: The combination of heavy snowfall and high winds led to extensive property damage across the region.
  • Economic Impact: The economic losses were substantial, with estimated damages of $66.7 million at the time (equivalent to approximately $647 million today).

Aftermath:

  • Flooding: Rapid snowmelt caused severe flooding along the Ohio River, significantly affecting cities like Cincinnati.
  • Response Improvements: The aftermath of the storm led to advancements in weather forecasting and emergency response protocols, aiming to mitigate the impact of future storms​.
1950 Great Appalachian Storm

1967 Chicago Blizzard

Event Overview: In January 1967, Chicago experienced one of its most severe blizzards. The storm paralyzed the city with 23 inches of snow within 29 hours.

Impact:

  • Casualties: The blizzard caused 60 deaths.
  • Disruptions: Over 20,000 cars were stranded, and massive traffic disruptions ensued, including major airport closures.
  • Economic Losses: The city faced significant economic losses due to halted transportation and business activities.

Aftermath:

  • Structural Damage: Many older buildings suffered roof collapses and structural failures.
  • Response Improvements: The storm led to advancements in snow removal techniques and enhanced emergency response protocols​​.

1978 Northeastern United States Blizzard

Event Overview: The Blizzard of 1978 hit the Northeastern United States in early February, dumping up to 27 inches of snow in some areas and paralyzing the region.

Impact:

  • Casualties: The storm resulted in 99 deaths.
  • Power Outages: Widespread power outages occurred, affecting millions.
  • Infrastructure Damage: Extensive damage to homes and public infrastructure was reported.

Aftermath:

  • Economic Impact: The economic impact was significant, with billions in damages.
  • Response Improvements: The blizzard led to improved emergency response protocols and better building codes to withstand heavy snow loads​​.

1993 Storm of the Century

Event Overview: The Storm of the Century in March 1993 affected the entire eastern seaboard, from Florida to Maine. It brought blizzard conditions, severe thunderstorms, and coastal flooding.

Impact:

  • Casualties: The storm caused 270 deaths.
  • Damage Extent: The snow, ice, and wind affected 26 states, causing extensive damage.
  • Economic Losses: The economic losses were estimated to be over $5 billion.

Aftermath:

  • Infrastructure Damage: Significant infrastructure damage and long-lasting power outages were reported.
  • Response Improvements: The storm led to advancements in weather forecasting and emergency response coordination across multiple states​.

2003 President’s Day Storm II

Event Overview: The President’s Day Storm II in February 2003 blanketed the Mid-Atlantic and Northeast with up to 30 inches of snow.

Impact:

  • Casualties: The storm resulted in 20 deaths.
  • Disruptions: Widespread disruptions in transportation and daily life were reported.
  • Economic Losses: Significant economic losses due to business closures and transportation delays.

Aftermath:

  • Structural Damage: Extensive damage to homes and buildings due to the weight of the snow.
  • Response Improvements: The storm emphasized the importance of timely snow removal and robust emergency response plans.

2011 Groundhog Day Blizzard

Event Overview: The Groundhog Day Blizzard of February 2011 brought severe snow and ice storms to the Midwest and Northeast.

Impact:

  • Casualties: The storm caused 36 deaths.
  • Utility Disruptions: Significant disruptions to utilities and transportation networks were reported.
  • Economic Losses: Billions of dollars in damages were incurred.

Aftermath:

  • Structural Damage: Roof collapses and ice dams led to extensive damage to homes.
  • Response Improvements: The storm highlighted the need for effective snow and ice management practices, including the use of tools like roof rakes to prevent roof collapses​.

2019 Bomb Cyclone

Event Overview: In March 2019, the Bomb Cyclone brought extreme weather conditions, including heavy snow, strong winds, and severe flooding, affecting 25 states.

Impact:

  • Damage Extent: Extensive damage to homes, infrastructure, and transportation networks was reported.
  • Economic Losses: Billions in damages were incurred.
  • Casualties: Several fatalities and numerous injuries were reported.

Aftermath:

  • Response Improvements: The event underscored the importance of emergency preparedness and effective snow removal strategies to protect properties and infrastructure.

Blizzards pose a significant threat to people and property, causing extensive damage and economic losses. Proactive measures, such as timely snow removal using tools like roof rakes, are essential to mitigate these impacts and safeguard our homes. Understanding the history and impact of these major blizzards helps us better prepare for future storms.

Impact of Blizzards on Homes

Structural Damage

Heavy snow accumulation poses a serious risk to homes, particularly older buildings with weaker structures. As snow piles up on roofs, the weight can exceed the building’s load-bearing capacity, leading to roof collapses. This is especially problematic in regions unaccustomed to heavy snowfall, where roofs are not designed to handle significant snow loads.

Detailed Effects:

  • Roof Collapses: When snow accumulates on roofs, the weight can cause them to cave in, leading to severe structural damage and safety hazards for the occupants.
  • Walls and Foundations: Excessive snow can also exert pressure on walls and foundations, leading to cracks and long-term structural weaknesses.

Water Damage

Melting snow can cause significant water damage to homes. As snow melts, water can seep into roofs, walls, and foundations, leading to leaks, mold growth, and wood rot. This can compromise the structural integrity of the home and pose health risks to its occupants.

Detailed Effects:

  • Roof Leaks: Melting snow can infiltrate roofing materials, causing leaks and water damage to ceilings and attic spaces.
  • Mold Growth: Persistent moisture from snowmelt can lead to mold growth, which is harmful to health and difficult to remediate.
  • Wood Rot: Water seeping into wooden structures can cause rot, weakening the wood and potentially leading to structural failures.

Ice Dams

Ice dams form when the heat from the attic melts the snow on the roof, and the water runs down to the eaves and refreezes. This cycle creates a buildup of ice at the roof edge, preventing proper drainage and leading to water backup and damage.

Detailed Effects:

  • Roof Damage: The weight of ice dams can damage shingles and gutters.
  • Water Infiltration: Water trapped by ice dams can seep under roofing materials, leading to leaks and extensive water damage inside the home.
  • Costly Repairs: Fixing damage caused by ice dams can be expensive and time-consuming, often requiring professional intervention.

❗❕❗❕Click here to learn more about ice dams!

Why Snow Removal Tools Are Essential

Roof Rake Benefits

Using a roof rake to remove snow from your roof is a simple yet effective way to prevent significant damage during winter storms. Here’s why roof rakes are indispensable:

Prevents Roof Collapse

  • Heavy snow loads can cause immense stress on your roof, leading to potential collapses. Regularly using a roof rake to remove snow can significantly reduce this risk. This proactive approach ensures that your home remains structurally sound even during severe snowstorms.

Reduces Ice Dam Formation

  • Ice dams can form when the heat from your attic melts snow on the roof, which then refreezes at the eaves. These ice dams can cause water to back up under shingles, leading to leaks and extensive water damage. By clearing snow before it has a chance to melt and refreeze, roof rakes help maintain the integrity of your roof.

Cost-Effective Maintenance

  • Investing in a roof rake is a cost-effective way to prevent long-term damage and avoid high repair costs. Regular maintenance using this tool can save homeowners from the expensive and extensive repairs often required after winter storms. By preventing issues like roof collapses and water damage, a roof rake pays for itself many times over.

Practical and Easy to Use

  • Roof rakes are designed for ease of use, allowing homeowners to clear snow without having to climb onto the roof. This not only makes the task safer but also more convenient, ensuring that snow removal becomes a regular and manageable part of winter home maintenance.

Other Essential Snow Removal Tools

While roof rakes are crucial, there are other tools that can help maintain your property during winter:

Snow Shovels

  • Snow shovels are versatile tools essential for clearing driveways, walkways, and other flat surfaces. Choosing a sturdy, ergonomic shovel can make the task easier and reduce the risk of back injuries.

Snow Blowers

  • For those with larger footprints or heavy snowfall, snow blowers are invaluable. These machines can quickly clear large areas of snow, making them ideal for driveways and larger walkways.

Ice Melt Products

  • Using ice melt products can help prevent slippery surfaces and reduce the risk of falls. These products can also aid in breaking down ice dams, further protecting your roof and home.

Investing in snow removal tools like roof rakes, snow shovels, and snow blowers is essential for maintaining your home during the winter months. These tools help prevent structural damage, reduce the risk of ice dams, and ensure that your property remains safe and accessible. By incorporating these tools into your winter maintenance routine, you can protect your home and avoid costly repairs in the future.

Conclusion: Major Blizzards

Blizzards pose a serious threat to people and property, causing extensive damage and necessitating proactive measures to mitigate their impact. The structural and water damage from heavy snow and ice can be devastating, emphasizing the importance of effective snow management practices.

Take action to protect your home this winter. Invest in essential snow removal tools like roof rakes to ensure roof safety and extend the lifespan of your building. By staying proactive and prepared, you can safeguard your property and prevent costly damage. Let’s prioritize our home’s safety and resilience against the harsh winter elements.

Posted on Leave a comment

Is Your Roof Ready for Winter? Get the Importance of a Snow Load Calculator!

Introduction

Ever wondered if your roof can handle a massive snowfall? In 2015, a record-breaking blizzard in Boston caused numerous roof collapses due to an excessive snow load. A Snow Load Calculator is crucial in preventing such disasters. The angle of your roof pitch plays a significant role in how snow accumulates and sheds.

In this blog, we’ll break down how to calculate roof snow load, why roof pitch matters, and provide practical tips for maintaining your roof during winter. Stay safe and ensure your roof can withstand the snow this season!

Please note that the figures provided by this calculator are estimates and may not be entirely precise. It’s essential to regularly clear ice accumulation and watch for any signs of roof stress. If you’re uncertain, it’s always best to shovel early!

Understanding Snow Load: Definition, Significance, and Impact

Snow Load Calculator

What is Snow Load?

Snow load refers to the downward force exerted by accumulated snow on a structure, typically measured in pounds per square foot (psf). It’s a critical factor in architectural design and safety, especially in regions prone to heavy snowfall.

Definition and Significance

Snow load is the weight of snow that accumulates on a surface, such as a roof. Understanding snow load is essential because it helps determine the structural integrity and safety of buildings during winter months. Engineers and architects use snow load calculations to design roofs and other structures to withstand the expected snow accumulation, thereby preventing potential damage or collapse.

Real-World Impacts and Risks

Snow load can have significant real-world impacts and risks, including:

  • Roof Collapse: Excessive snow load can cause roofs to sag or even collapse, posing a danger to the inhabitants and causing extensive property damage.
  • Structural Damage: Persistent heavy snow can lead to cracks in walls and ceilings, weakening the overall structure.
  • Water Damage: Melting snow can form ice dams, leading to leaks and water damage inside buildings.

Understanding and managing snow load is crucial to mitigating these risks and ensuring the safety of buildings and their occupants.

Calculating Snow Load: Methods, Formulas, and Practical Examples

Key Formulas and Methods for Snow Load Calculation

Calculating snow load accurately is crucial for ensuring the safety and structural integrity of buildings in snowy regions. Here’s a detailed look at the key formulas and methods used to determine snow load.

Basic Snow Load Formula

The general formula to calculate the snow load (SSS) on a roof is:

S=p×AS = p \times AS=p×A

Where:

  • SSS is the snow load (in pounds).
  • ppp is the snow pressure (in pounds per square foot, psf).
  • AAA is the area of the roof (in square feet).

Determining Snow Pressure (ppp)

Snow pressure depends on several factors, including snow density and depth. The basic formula for snow pressure is:

p=ρ×hp = \rho \times hp=ρ×h

Where:

  • ppp is the snow pressure (psf).
  • ρ\rhoρ (rho) is the density of the snow (pounds per cubic foot, pcf).
  • hhh is the depth of the snow (feet).

Importance of Accurate Measurements

Accurate measurements of snow density and depth are essential for precise snow load calculations. Incorrect measurements can lead to underestimating or overestimating the load, risking structural failure or unnecessary reinforcement.

Factors Influencing Snow Load Calculations

Several key factors influence snow load calculations:

  1. Snow Density:
    • Fresh snow: 5-20 pcf
    • Compacted snow: 20-30 pcf
    • Ice: ~57 pcf
  2. Roof Pitch:
    • Steeper roofs generally shed snow more effectively, reducing load.
  3. Exposure to Wind:
    • Wind can redistribute snow, causing uneven accumulation.
  4. Local Building Codes:
    • Codes often provide specific snow load requirements based on regional data.

Example Calculation

Let’s consider an example to illustrate snow load calculation:

  1. Scenario:
    • Roof area (AAA): 1000 square feet
    • Snow depth (hhh): 2 feet
    • Snow density (ρ\rhoρ): 20 pcf (for wet, heavy snow)
  2. Calculation:
    1. Calculate snow pressure (ppp): p=ρ×hp = \rho \times hp=ρ×h p=20 pcf×2 ft=40 psfp = 20 \, \text{pcf} \times 2 \, \text{ft} = 40 \, \text{psf}p=20pcf×2ft=40psf
    2. Calculate snow load (SSS): S=p×AS = p \times AS=p×A S=40 psf×1000 sq ft=40,000 poundsS = 40 \, \text{psf} \times 1000 \, \text{sq ft} = 40,000 \, \text{pounds}S=40psf×1000sq ft=40,000pounds

Utilizing a Snow Load Calculator

A snow load calculator simplifies this process by allowing users to input relevant data and automatically computing the snow load. These calculators typically consider various factors, such as:

  • Snow Weight: Calculated from snow density and depth.
  • Roof Characteristics: Including pitch and materials.
  • Geographic Location: Adjusted for local weather patterns and building codes.

Practical Tips for Using a Snow Load Calculator

  1. Input Accurate Data: Ensure snow depth and density measurements are precise.
  2. Consider Roof Features: Enter specific details about the roof’s slope and material.
  3. Use Local Guidelines: Incorporate local building codes for accurate calculations.

By following these guidelines, you can effectively use a snow load calculator to ensure your building can safely withstand winter snow loads.

Step-by-Step Guide to Using the Snow Load Calculator

Introduction to the Calculator

A snow load calculator is an essential tool for accurately determining the snow load on a structure. This guide will walk you through using a snow load calculator effectively.

How to Use the Snow Load Calculator

Follow these steps to calculate snow load accurately:

  1. Gather Required Information:
    • Measure the roof area (in square feet).
    • Measure the snow depth (in feet).
    • Determine the snow density (in pounds per cubic foot, pcf).
  2. Access the Calculator:
    • Open a snow load calculator tool online.
  3. Input Roof Area:
    • Enter the total roof area (A) in square feet.
  4. Input Snow Depth:
    • Enter the snow depth (h) in feet.
  5. Input Snow Density:
    • Select or enter the snow density (ρ). Typical values are:
      • Fresh snow: 5-20 pcf
      • Compacted snow: 20-30 pcf
      • Ice: ~57 pcf
  6. Adjust for Roof Pitch and Wind Exposure:
    • If applicable, enter details about the roof pitch and wind exposure. Steeper roofs may have adjusted snow loads due to snow shedding, and areas with high wind exposure may have uneven snow distribution.
  7. Review Local Building Codes:
    • Ensure your calculations align with local building codes, which may have specific requirements based on historical snow load data for your region.
  8. Calculate Snow Load:
    • The calculator will compute the snow pressure (p) and total snow load (S) using the formulas:p=ρ×hp = \rho \times hp=ρ×h S=p×AS = p \times AS=p×A

Example Calculation Using a Snow Load Calculator

Example Scenario:

  • Roof area: 2000 square feet
  • Snow depth: 3 feet
  • Snow density: 25 pcf (wet, heavy snow)

Step-by-Step Calculation:

  1. Input Data:
    • Roof area (A): 2000 sq ft
    • Snow depth (h): 3 ft
    • Snow density (ρ): 25 pcf
  2. Calculate Snow Pressure (p): p=ρ×hp = \rho \times hp=ρ×h p=25 pcf×3 ft=75 psfp = 25 \, \text{pcf} \times 3 \, \text{ft} = 75 \, \text{psf}p=25pcf×3ft=75psf
  3. Calculate Snow Load (S): S=p×AS = p \times AS=p×A S=75 psf×2000 sq ft=150,000 poundsS = 75 \, \text{psf} \times 2000 \, \text{sq ft} = 150,000 \, \text{pounds}S=75psf×2000sq ft=150,000pounds

Tips for Accurate Snow Load Calculation

  • Verify Measurements: Ensure snow depth and density measurements are accurate.
  • Consider Roof Features: Include details about the roof’s slope and material.
  • Consult Local Codes: Always check local building codes for specific snow load requirements.

By following these steps, you can effectively use a snow load calculator to ensure the structural safety of your building during winter.

Permissible Snow Load: USA

When dealing with snow removal from rooftops in the USA, it’s crucial to understand the concept of permissible snow load. This refers to the maximum amount of snow weight that a roof can safely support without risking structural damage. The permissible snow load varies based on factors such as regional climate, building codes, roof design, and the type of construction materials used.

In areas with heavy snowfall, like the Northeast and the Rocky Mountains, building codes are stricter and designed to accommodate higher snow loads. The International Building Code (IBC) provides guidelines that many states and municipalities follow, setting minimum snow load requirements. For example, the IBC might specify a minimum snow load of 30 pounds per square foot (psf) in certain high-snowfall regions.

However, local codes can be more stringent. For instance, in parts of Alaska, permissible snow loads can exceed 100 psf due to the extreme snowfall. It’s essential to consult local building codes or a structural engineer to determine the specific requirements for your area.

Properly assessing and adhering to the permissible snow load ensures the safety and integrity of your home. Exceeding this limit can lead to severe consequences, including roof collapse, structural damage, and significant repair costs. Therefore, understanding and respecting the permissible snow load is a critical step in effective snow removal and roof maintenance.

Permissible Snow Load: Canada

Understanding permissible snow loads is equally important in Canada, where heavy snowfall is common across many regions. The permissible snow load indicates the maximum snow weight that a roof can safely handle without risking structural failure. Here’s a breakdown of key considerations:

aximum snow weight that a roof can safely handle without risking structural failure. Here’s a breakdown of key considerations:

1. Regional Variations:

  • Northern Regions: In areas such as the Yukon, Northwest Territories, and Nunavut, permissible snow loads can be extremely high, often exceeding 150 pounds per square foot (psf) due to severe winter conditions.
  • Eastern Provinces: Regions like Newfoundland and Labrador, and parts of Quebec, experience heavy snowfalls requiring higher permissible snow loads, typically around 60-80 psf.
  • Western Provinces: In British Columbia, especially in mountainous areas, permissible snow loads are also high, ranging from 50-100 psf depending on elevation and snowfall patterns.

2. National Building Code of Canada (NBC):

  • The NBC provides guidelines for determining snow loads, considering factors such as geographic location, altitude, and the presence of snow drifts.
  • Engineers often use NBC standards in conjunction with local data to calculate precise snow load requirements for specific areas.

3. Roof Design and Materials:

  • Roof Pitch: Steeper roofs tend to shed snow more effectively, reducing snow load accumulation.
  • Materials: Durable materials like metal and specific roofing systems designed to handle heavy snow loads are preferred in high-snowfall regions.

4. Consulting Experts:

  • Engaging with local building authorities and structural engineers is essential to ensure compliance with regional building codes and to accurately determine permissible snow loads for your specific location.

5. Safety Considerations:

  • Regular inspections and maintenance are crucial to prevent snow load-related damage.
  • Implementing snow removal strategies that align with the permissible snow load helps maintain the structural integrity of the building and ensures safety.

Adhering to the permissible snow load guidelines in Canada is vital for the longevity and safety of structures in snowy regions. Proper planning and maintenance can mitigate risks and protect against the severe consequences of excessive snow accumulation.

Should I Shovel My Roof Today?

Deciding whether to shovel your roof today depends on several critical factors. Here are some key considerations to help you make an informed decision:

1. Snow Accumulation:

  • Current Snow Depth: Measure the snow depth on your roof. If it exceeds the permissible snow load for your area or roof type, it’s time to shovel. Typically, 6 inches of wet, heavy snow or 12 inches of light, fluffy snow can pose a significant risk.
  • Recent Snowfall: Consider the recent weather. Continuous snowfall can quickly add to the existing snow load, increasing the risk of structural damage.

2. Weather Forecast:

  • Upcoming Snow: Check the weather forecast for any impending snowstorms. If more snow is expected, it’s wise to remove the current accumulation to prevent excessive load buildup.
  • Temperature Fluctuations: Warmer temperatures can cause snow to melt and refreeze, adding weight to your roof. Conversely, if a cold snap is predicted, the snow will remain, increasing the load.

3. Roof Structure and Type:

  • Flat vs. Sloped Roofs: Flat roofs are more prone to snow accumulation and might require more frequent shoveling. Sloped roofs can shed snow more effectively but still need monitoring, especially in valleys and lower slopes.
  • Roof Condition: Ensure your roof is in good condition before attempting to shovel. Damaged or weakened roofs are at a higher risk of collapsing under heavy snow.

4. Safety Considerations:

  • Personal Safety: Shoveling a roof can be dangerous. Ensure you have the proper equipment, such as a roof rake with an extendable handle, and take necessary precautions to avoid falls and injuries. If in doubt, consider hiring a professional snow removal service.
  • Structural Safety: Avoid using sharp tools that could damage the roofing material. Be gentle and systematic in your approach to prevent any structural damage.

By assessing these factors, you can make a well-informed decision about whether to shovel your roof today. Prioritizing safety and adhering to best practices will help protect your home and ensure the longevity of your roof.

Conclusion

Understanding and managing your roof’s snow load is essential for ensuring the safety and longevity of your home. Use a snow load calculator to accurately assess the weight your roof can handle and take proactive measures to remove excess snow. Don’t wait until it’s too late—regularly check your roof, stay informed about local snow load guidelines, and take action to protect your home. Let’s work together to keep our roofs safe and secure this winter!

Posted on Leave a comment

Which Tool Should You Choose for Removing Roof Snow: Shovel, Blower, or Rake?

Introduction: Roof Snow Removal Tools

Is your roof ready for winter’s heavy snow? Choosing the Right Snow Removal Tools to Keep Your Roof Safe: Choosing the Right Roof Snow Removal Tools. With so many options—shovels, blowers, and rakes—it can be tough to decide which one to use.

Each tool has its pros and cons. This guide will break down the benefits and drawbacks of each, helping you choose the best option for your needs. Let’s dive in and find the perfect tool to keep your roof in top shape this winter!

Why Clearing Snow Off Your Roof is So Important

Removing snow from your roof isn’t just a chore; it’s crucial for maintaining your home’s integrity and functionality. Here are the key reasons why you need to keep your roof clear of snow:

  • Prevent Roof Damage: Heavy snow can cause significant damage to your roof. The weight of the snow can lead to structural damage, including roof sagging or even collapse in extreme cases.
  • Avoid Ice Dams: When snow melts and refreezes at the edge of your roof, it can form ice dams. These ice dams prevent proper drainage, leading to water leaks and potential interior damage.
  • Prolong Roof Lifespan: Regular snow removal helps preserve the lifespan of your roof. By preventing damage and leaks, you ensure your roof remains functional and in good condition for many years.

Choosing the Right Roof Snow Removal Tools

When deciding which tool to use, consider the following factors:

  • Roof Type and Structure: Different roof types (e.g. flat vs. sloped) and materials (e.g. shingles vs. metal) may influence your tool choice.
  • Snow Depth and Area: The amount and extent of snow on your roof play a significant role. Thicker, more widespread snow might require more powerful tools.
  • Physical Health and Strength: Some tools demand more physical exertion than others. Choose a tool that matches your physical capabilities to avoid injury.

By understanding the pros and cons of each tool and considering these factors, you can make an informed decision that ensures effective snow removal and maintains the health of your roof.

Roof Snow Removal Tools: The Shovel

Design and Function

A roof shovel is a simple, manual tool designed for clearing snow from your roof. These shovels typically have a lightweight, wide blade made from materials like plastic or aluminum, which helps you scoop and push snow off your roof. The handle is often long and sometimes curved, making it easier to reach higher areas and pull snow down without having to climb onto the roof.

Pros

  • Affordable: Roof shovels are generally inexpensive, making them a budget-friendly option for snow removal.
  • Easy to Use: The straightforward design means there’s no learning curve—just grab and go.
  • No Power Needed: Unlike blowers, roof shovels don’t require electricity or fuel, so you can use them anytime, anywhere.

Cons

  • Physically Demanding: Using a shovel requires significant physical effort, which can be tiring, especially for larger roofs or heavy snowfalls.
  • Time-Consuming: Clearing snow with a shovel can take a long time, particularly if the snow is deep or packed.
  • Risk of Roof Damage: There’s a chance you could damage your shingles if you’re not careful, especially with metal blades.

Best for

  • Small Snow Accumulations: Ideal for roofs with lighter snow loads that don’t need heavy-duty equipment.
  • Easily Accessible Roofs: Perfect for single-story homes or roofs that are low to the ground and easy to reach.

Summary Table: Roof Shovel

ProsConsBest for
AffordablePhysically demandingSmall snow accumulations
Easy to useTime-consumingEasily accessible roofs
No power neededRisk of roof damage

Choosing a roof shovel is a practical choice for those looking to save money and who don’t mind putting in some elbow grease. Just remember to take breaks and use proper techniques to avoid injury and protect your roof.

Roof Snow Removal Tools: The Blower

Design and Function

A roof blower is a powerful tool designed to make snow removal from your roof quick and efficient. Roof blowers can be either gas-powered or electric, and they use strong airflow to blow snow off your roof without you having to climb up there. The design includes a motor, a handle for control, and a nozzle that directs the airflow to where you need it most.

Pros

  • Time-Saving and Effortless: Roof blowers can clear large areas of snow in a fraction of the time it would take with a shovel or rake.
  • Efficient for Large Snowfalls: These tools are particularly effective for handling heavy snow accumulations and can quickly clear large roofs.
  • Minimal Roof Damage: Since you’re not scraping the roof directly, there’s less risk of damaging shingles or other roofing materials.

Cons

  • Higher Cost: Roof blowers can be more expensive than other snow removal tools, both in initial purchase and maintenance.
  • Power Source Needed: They require either a power outlet (for electric models) or fuel (for gas models), which can limit where and how you use them.
  • Skill Required: Operating a roof blower effectively and safely takes some practice and skill, particularly in maneuvering the blower and managing the power settings.

Best for

  • Large Snow Accumulations: Ideal for homes with large roofs or areas that receive heavy snowfall regularly.
  • Hard-to-Reach Roofs: Perfect for multi-story homes or roofs that are difficult to access with manual tools.

Summary Table: Roof Blower

ProsConsBest for
Time-saving and effortlessHigher costLarge snow accumulations
Efficient for large snowfallsNeeds power sourceHard-to-reach roofs
Minimal roof damageRequires skill to operate

Using a roof blower can significantly reduce the physical strain and time required to clear your roof of snow. However, the initial investment and need for power or fuel are important considerations. If you have a large or difficult-to-reach roof, a blower might be the most efficient way to keep it clean and safe during the winter.

Roof Snow Removal Tools: The Rake

Design and Function

A roof rake is a straightforward yet effective tool designed specifically for removing snow from roofs without the need to climb up. It typically features a long handle, often telescopic for reaching higher areas, and a wide, flat blade or rake head. This design allows you to safely remove snow from your roof from the ground, reducing the risk of damage to both your roof and yourself.

Dive into the world of roof rakes here!

Pros

  • Affordable: Roof rakes are budget-friendly compared to powered tools like blowers.
  • Versatile: Suitable for various roof types, including shingle, metal, and tile roofs.
  • No Power Needed: Operates manually, making it environmentally friendly and easy to use without fuel or electricity.

Cons

  • Physical Exertion: Requires physical effort, especially when removing heavy or compacted snow.
  • Limited Effectiveness for Deep Snow: Not ideal for very thick or densely packed snow layers.
  • Fatigue Risk: Prolonged use can lead to muscle strain and fatigue, necessitating breaks during snow removal sessions.

Best for

  • Moderate Snow Accumulations: Ideal for homes with moderate snowfall where snow accumulation is manageable.
  • Accessible Roofs: Perfect for single-story homes or roofs that are easy to reach from the ground without the need for ladders or scaffolding.

Usage Tips

  • Start Early: Begin snow removal as soon as accumulation reaches manageable levels to prevent ice dams.
  • Work in Sections: Divide the roof into manageable sections to prevent overexertion and ensure thorough snow removal.
  • Clear Regularly: Periodically clear the rake head to maintain its effectiveness and prevent snow buildup.

Summary Table: Roof Rake

ProsConsBest for
AffordablePhysical exertion requiredModerate snow accumulations
VersatileLimited effectiveness for deep snowAccessible roofs
No power neededPotential for fatigue

Choosing a roof rake provides a cost-effective and practical solution for homeowners looking to maintain their roofs during winter. While it requires physical effort and may not be suitable for all snow conditions, its simplicity and effectiveness make it a popular choice for many.

How to Choose the Right Roof Snow Removal Tools

Choosing the right tool for clearing snow off your roof depends on various factors, including your roof type, snow conditions, and personal preferences. Here’s a detailed guide to help you make an informed decision.

Consider Your Roof Type and Structure

Different roofs have different needs when it comes to snow removal. Here’s how to choose the right tool based on your roof type:

Flat Roofs

  • Best Tool: Snow Blower or Shovel
  • Why: Flat roofs can accumulate a lot of snow due to their large surface area and lack of slope. Snow blowers are effective for quickly removing large amounts of snow. For smaller flat roofs, a shovel can work well, allowing for precise removal without the need for machinery.
  • Details:
    • Snow Blower: Ideal for covering extensive flat surfaces quickly. Look for models with adjustable chutes to direct the snow away from the roof.
    • Shovel: Choose a lightweight, ergonomic shovel to reduce physical strain. Ensure the blade is wide enough to clear significant amounts of snow per scoop.

Sloped Roofs

  • Best Tool: Roof Rake
  • Why: Raking the roof helps you remove snow while standing safely on the ground, minimizing the risk of falling or damaging the roof. The long handle helps you reach higher areas without climbing.
  • Details:
    • Roof Rake: Opt for a rake with a telescoping handle to reach various heights. Some rakes come with rollers or wheels to prevent damage to shingles.

Low Roofs

  • Best Tool: Shovel or Roof Rake
  • Why: Low roofs are easily accessible, making both shovels and roof rakes effective tools. A shovel works well for small areas, while a roof rake is suitable for larger surfaces.
  • Details:
    • Shovel: Use a shovel with a non-abrasive edge to avoid damaging the roof surface. A plastic or coated metal blade is ideal.
    • Roof Rake: A rake with an extendable handle allows you to reach across the roof without climbing, ensuring safety and efficiency.

High Roofs

  • Best Tool: Snow Blower or Roof Rake with Extension
  • Why: High roofs are harder to reach, so a snow blower with a long chute or a roof rake with an extension handle can make the job easier and safer.
  • Details:
    • Snow Blower: Choose a model with a powerful engine and long throw distance. This allows you to clear snow from the roof without getting too close to the edge.
    • Roof Rake with Extension: Look for a rake with a long, adjustable handle. Some models come with additional extensions to reach very high roofs.
Roof TypeBest ToolWhy
FlatSnow Blower/ShovelEfficient for large snow accumulation
SlopedRoof RakeAllows safe snow removal from the ground
LowShovel/RakeEasy to reach and clear
HighBlower/Rake w/ ExtMakes hard-to-reach areas accessible

Consider Snow Depth and Area

The amount and extent of snow on your roof are crucial factors in choosing the right tool:

Light Snowfall

  • Best Tool: Shovel or Roof Rake
  • Why: For light, fluffy snow, a shovel or roof rake is sufficient and easy to use.
  • Details:
    • Shovel: A lightweight shovel can easily handle light snow without much physical effort. Choose one with a comfortable grip and ergonomic design.
    • Roof Rake: A roof rake with a wide head can quickly clear light snow from larger areas. Ensure the handle is long enough to reach all parts of the roof.

Heavy Snowfall

  • Best Tool: Snow Blower
  • Why: Heavy, wet snow can be challenging to clear with a shovel. A snow blower can handle larger amounts of heavy snow more efficiently.
  • Details:
    • Snow Blower: Select a two-stage or three-stage snow blower for heavy snow. These models are designed to handle thick, wet snow and ice. Look for features like heated handles and headlamps for added convenience during cold, dark conditions.

Large Areas

  • Best Tool: Snow Blower
  • Why: If you have a large roof surface to clear, a snow blower can save you a lot of time and effort.
  • Details:
    • Snow Blower: A wide clearing width and high intake height make snow blowers ideal for large areas. Consider models with adjustable speed settings and easy maneuverability.

Small Areas

  • Best Tool: Shovel
  • Why: For small roof sections, a shovel is convenient and practical.
  • Details:
    • Shovel: Use a compact, lightweight shovel to navigate small spaces easily. A shovel with an angled handle can help reduce strain on your back and shoulders.
Snow ConditionBest ToolWhy
Light SnowfallShovel/RakeSufficient for light, fluffy snow
Heavy SnowfallSnow BlowerHandles heavy, wet snow efficiently
Large AreasSnow BlowerSaves time and effort
Small AreasShovelConvenient for small sections

By considering these factors, you can choose the most suitable tool for your roof snow removal needs. Whether it’s a shovel for small, easily accessible areas, a roof rake for safety on sloped roofs, or a snow blower for large, heavy snowfalls, selecting the right tool will make the job easier and more effective.

Safety Tips for Using Roof Snow Removal Tools

When it comes to using roof snow removal tools, safety should always be your top priority. Clearing snow off your roof can be dangerous if not done properly. Here are some essential safety tips to keep in mind:

Wear the Right Gear

Proper clothing and gear can protect you from the cold and potential injuries:

  • Warm Clothing: Dress in layers to stay warm. Wear a waterproof outer layer to keep dry.
  • Non-Slip Boots: Use boots with good traction to prevent slipping on ice and snow.
  • Gloves: Insulated gloves will keep your hands warm and protect them from blisters.
  • Safety Goggles: Protect your eyes from snow and ice debris.

Use the Right Tools Correctly

Each tool has specific safety considerations:

  • Shovels:
    • Lift with Your Legs: Avoid back injuries by lifting with your legs, not your back. Bend your knees and keep your back straight.
    • Take Breaks: Shoveling can be strenuous. Take regular breaks to avoid overexertion.
  • Snow Blowers:
    • Read the Manual: Familiarize yourself with the snow blower’s operation manual. Follow all safety instructions.
    • Keep Hands Clear: Never clear a jam with your hands. Use a tool or stick to remove obstructions.
  • Roof Rakes:
    • Work from the Ground: Always stand on the ground when using a roof rake. Never climb on a ladder or the roof itself.
    • Be Aware of Power Lines: Be cautious of overhead power lines. Avoid contact with them to prevent electric shock.

Clear Snow Safely

Make sure you’re clearing snow in a way that minimizes risk:

  • Clear in Small Batches: Don’t try to remove all the snow at once. Clear small sections to avoid large, heavy loads that could cause injury or roof damage.
  • Watch for Ice: Be cautious of ice beneath the snow. Ice can be slippery and hazardous.
  • Stay Hydrated: Even in cold weather, it’s important to stay hydrated. Drink water regularly.

Avoid Roof Damage

Protect your roof while clearing snow:

  • Use Non-Abrasive Tools: Choose tools with plastic or rubber edges to avoid scraping and damaging shingles.
  • Don’t Overdo It: Remove only as much snow as necessary to prevent ice dams. Leaving a thin layer of snow can actually help protect the roof surface.

Know When to Call Professionals

Sometimes, it’s best to leave the job to experts:

  • Heavy Snow: If there’s a significant amount of snow or ice, consider hiring a professional to remove it safely.
  • Hard-to-Reach Areas: For high or steep roofs, professionals have the equipment and experience to clear snow without risk.

By following these safety tips, you can effectively and safely use your roof snow removal tools. Remember, taking the right precautions not only protects you but also ensures the longevity and integrity of your roof.

Conclusion: Choosing the Right Roof Snow Removal Tools

Selecting the right roof snow removal tools is crucial for maintaining the safety and longevity of your home during the winter months. By understanding the unique advantages and disadvantages of shovels, snow blowers, and roof rakes, you can make an informed decision that best suits your specific needs and roof type.

Remember, your choice of tool should consider factors like the amount of snowfall, the size and slope of your roof, and your own physical capabilities. Always prioritize safety by wearing appropriate gear, using tools correctly, and knowing when to call in professionals.

By taking these considerations to heart, you’ll be well-equipped to tackle even the harshest winter weather, ensuring your roof remains in top condition. Don’t wait for the snow to pile up—invest in the right roof snow removal tools today and take control of your winter home maintenance.

Ready to gear up for winter? Choose the right tools now and keep your roof safe and sound all season long!

Posted on Leave a comment

How to Use a Roof Rake Safely to Prevent Ice Dams?

Introduction

Ever wondered how to keep your roof safe from those pesky ice dams this winter? Ice dams can cause serious damage, but you can prevent them effectively with the right tools and techniques. This blog will cover everything you need to know about using a roof rake safely, from preparation to execution, and even maintenance tips.

By the end of this guide, you’ll be equipped with practical knowledge and actionable steps to protect your home. Let’s get started and make sure your winter is worry-free!

What Are Ice Dams and Why Are They a Big Deal? 

What Are Ice Dams? 

Ice dams are thick ridges of ice that form along the edges of your roof. They happen when the snow on your roof melts due to heat escaping from your home, then refreezes when it reaches the colder eaves. This creates a barrier that stops melting snow from draining off the roof. 

Why Are Ice Dams a Problem? 

Ice dams are more than just a winter nuisance—they can cause serious damage to your home. Here’s why: 

  1. Roof Damage: Ice dams can lift shingles, causing leaks and water damage. 
  2. Gutter Issues: The weight of the ice can pull gutters away from the house, leading to structural damage. 
  3. Interior Water Damage: Water trapped by ice dams can seep into your home, damaging walls, ceilings, and insulation. 
  4. Mold Growth: Persistent moisture can lead to mold and mildew, posing health risks. 

Preventing ice dams isn’t just about protecting your roof—it’s about safeguarding your entire home. Let’s dive into how you can use a roof rake to keep your roof clear and avoid these problems. 

Understanding Roof Rakes

What Exactly is a Roof Rake?

A roof rake is a long-handled tool designed to help you remove snow from your roof without having to climb up there yourself. It typically features a wide, flat head that allows you to pull snow off the roof, clearing it away safely from the ground.

Different Types of Roof Rakes

Choosing the right roof rake can make a big difference in how effectively you can clear snow from your roof. Here are some common types:

  1. Standard Roof Rakes: These are basic models with a fixed-length handle and a wide, flat head. They’re great for single-story homes and light snowfalls.
  2. Telescoping Roof Rakes: These rakes have extendable handles that can reach higher roofs, making them ideal for multi-story homes or homes with steep roofs.
  3. Wheeled Roof Rakes: These feature small wheels on the rake head, which help to prevent damage to shingles while you’re raking off the snow. They’re especially useful if you’re worried about scratching or damaging your roof.
  4. Adjustable Roof Rakes: These allow you to adjust the angle of the head, making it easier to use on different roof slopes and ensuring you can get the snow off more efficiently.

How Roof Rakes Help Prevent Ice Dams

Regularly using a roof rake can be a game-changer when it comes to preventing ice dams. Here’s how they help:

  • Reduces Snow Accumulation: By raking the snow off your roof, you prevent it from accumulating and melting, which can create ice dams.
  • Lowers Roof Load: Less snow means less weight on your roof, which can help prevent structural damage.
  • Improves Water Drainage: Clearing snow helps ensure that water drains properly off the roof, reducing the risk of it refreezing and forming ice dams.
  • Minimizes Risk of Roof Leaks: By keeping your roof clear, you reduce the chances of water seeping in and causing leaks or other damage.

Using a roof rake might seem straightforward, but there are a few key things you should know to do it safely and effectively. Next, we’ll cover how to prepare for safe roof raking.

Preparing for Safe Roof Raking

Inspect Your Roof Before Snow Falls

Before the first snowfall of the season, it’s a good idea to inspect your roof. Here’s what you should look for:

  • Damaged Shingles: Check for missing, cracked, or loose shingles that could be further damaged by snow and ice.
  • Weak Spots: Look for any areas that seem weak or sagging, as these could be problematic once the snow starts to accumulate.
  • Gutter Condition: Make sure your gutters are securely attached and free of debris, as clogged or damaged gutters can exacerbate ice dam issues.

By identifying and repairing these issues before winter, you’ll make your roof more resilient and safer for snow removal.

Clear the Ground Area

Safety should always be your top priority when using a roof rake. Make sure the area around your house is free of obstacles that could cause you to trip or fall. Here’s a checklist to help you prepare:

  • Remove Patio Furniture: Store away or move any outdoor furniture that might be in your work area.
  • Clear Away Tools and Equipment: Make sure garden tools, hoses, and other equipment are stored away.
  • Mark Any Hazards: If there are any permanent obstacles (like large rocks or decorative features), mark them clearly so you can avoid them.

Creating a clear and safe workspace will make it easier and safer for you to use your roof rake.

Ensure Proper Gear and Equipment

Having the right gear is essential for safe and effective roof raking. Here’s what you’ll need:

  • Non-Slip Boots: These will give you better traction on icy or snowy ground.
  • Warm Clothing: Dress in layers to stay warm, but make sure your clothing allows for easy movement.
  • Gloves: Choose gloves that provide warmth and a good grip.
  • Safety Goggles: Protect your eyes from falling snow and ice.

In addition to personal gear, make sure your roof rake is in good condition. Check the handle for any cracks or damage, and ensure the rake head is securely attached.

Now that you’re prepared, let’s move on to some essential safety tips for using your roof rake.

Essential Safety Tips for Using a Roof Rake

Stay Alert for Falling Snow and Icicles

When you’re using a roof rake, one of the biggest dangers is the risk of snow and icicles falling on you. Here’s how to stay safe:

  • Position Yourself Correctly: Always stand to the side of where you’re raking. This way, if snow or icicles fall, they won’t land directly on you.
  • Wear Protective Gear: A hard hat or helmet can protect your head, and goggles can shield your eyes from falling debris.
  • Check the Roof Beforehand: Look for large icicles or heavy snow overhangs that could come down while you’re raking.

Watch Out for Power Lines

Power lines can be a serious hazard when using a roof rake. Here’s what to keep in mind:

  • Maintain a Safe Distance: Always keep your roof rake well away from power lines. Even non-metal rakes can conduct electricity if wet.
  • Be Aware of Your Surroundings: Know where power lines are in relation to your roof and plan your raking path accordingly.
  • Use Non-Conductive Rakes: If possible, use a rake specifically designed to be non-conductive to minimize risk.

Avoid Overreaching and Overexertion

Using a roof rake can be physically demanding. Follow these tips to avoid injury:

  • Take Frequent Breaks: Don’t try to clear the entire roof in one go. Take regular breaks to avoid fatigue.
  • Use a Long-Handled Rake: This allows you to reach higher without straining or overreaching.
  • Work in Sections: Tackle the roof in small sections, raking a bit at a time to avoid overexerting yourself.

Dress for the Weather

Working outside in winter conditions requires proper attire:

  • Layer Up: Wear multiple layers to stay warm, but make sure you can move easily.
  • Wear Waterproof Boots: Keeping your feet dry and warm is crucial.
  • Use Gloves: Protect your hands from the cold and provide a better grip on the rake.

Keep Your Roof Rake in Good Condition

A well-maintained roof rake is essential for safe and effective use:

  • Check for Damage: Before use, inspect your rake for any cracks or damage.
  • Keep It Clean: Remove any dirt or debris that could affect its performance.
  • Store Properly: Store your rake in a dry place to prevent rust and damage.

Additional Safety Tips

  • Work with a Partner: Having someone with you can be helpful in case of an emergency.
  • Be Mindful of Roof Integrity: If your roof is old or damaged, consider professional help to avoid causing more damage.
  • Stay Grounded: If you feel unsafe at any point, stop and reassess. Your safety is more important than clearing the roof.

By following these tips, you can safely and effectively use a roof rake to keep your home free of excess snow and ice. Always prioritize safety and take your time to avoid accidents.

Step-by-Step Guide to Using a Roof Rake

Best Practices for Raking a Pitched Roof

Using a roof rake on a pitched roof requires some careful planning and technique. Here’s how to do it right:

Start from the Edge

  • Begin at the Roof Edge: Always start at the edge of the roof and work your way towards the center. This helps prevent snow from piling up and creating more weight.
  • Pull Snow Downward: Use a gentle pulling motion to bring the snow down. Don’t push it upwards, as this can damage your shingles.

Maintain a Safe Stance

  • Stay on the Ground: Never climb onto your roof with a rake. Always work from the ground to avoid slipping and falling.
  • Use a Long-Handled Roof Rake: Make sure your rake is long enough to reach the highest points without you needing to stretch or climb.

Handling Different Roof Materials

Different roof materials require different handling to avoid damage. Here’s what to keep in mind:

Asphalt Shingles

  • Gentle Raking: Be gentle when raking asphalt shingles to avoid tearing or dislodging them.
  • Avoid Metal Rakes: Use a plastic or rubber rake to minimize the risk of damage.

Metal Roofs

  • Non-Scratch Rake: Choose a rake with a non-scratch head to avoid damaging the metal surface.
  • Work Slowly: Metal roofs can be slippery, so take your time to avoid losing control of the rake.

Tile Roofs

  • Extra Care: Tiles can crack easily, so use extra caution.
  • Use a Foam Rake: Consider using a rake with a foam head to protect the tiles from cracking.

Techniques for Effective Snow Removal

Using the right technique makes all the difference in effective snow removal. Here’s how to get the best results:

Layer by Layer

  • Remove Snow in Layers: Instead of trying to pull off deep snow all at once, remove it layer by layer. This makes the job easier and reduces the risk of damage.
  • Light Pressure: Apply light pressure to avoid scraping or damaging the roof.

Avoid Overloading

  • Don’t Overload the Rake: Don’t try to pull too much snow at once. Overloading the rake can make it hard to control and increase the risk of damage.
  • Frequent Clearing: Clear the rake frequently to ensure it doesn’t become too heavy or unwieldy.

Additional Tips for Using a Roof Rake

Regular Maintenance

  • Inspect Your Rake: Check your rake before each use for any signs of damage or wear.
  • Clean After Use: Clean off any debris or snow residue after each use to keep it in good condition.

Safety First

  • Be Aware of Surroundings: Always be mindful of where you’re raking and any potential hazards like power lines or fragile roof features.
  • Use Proper Footwear: Wear sturdy, non-slip boots to maintain good footing on icy or snowy ground.

Work with a Partner

  • Buddy System: Having someone with you can provide extra safety and help if you need assistance.

By following these steps and tips, you can effectively and safely use a roof rake to manage snow buildup on your roof. Remember, taking your time and using the right techniques will help protect your roof and keep you safe during winter.

How to Deal with Ice Dams Using a Roof Rake

Spotting Ice Dams on Your Roof

Ice dams can cause serious damage if not addressed. Here’s how to identify them:

Look for Key Signs

  • Icicles on the Roof Edge: While icicles can be pretty, they often signal the presence of an ice dam.
  • Water Stains on Ceilings: If you notice water stains inside your home, it might be due to ice dams causing leaks.
  • Ice Build-Up: Ice building up along the gutters or at the roof edge is a clear sign of ice dams.

Inspect After Snowfall

  • Regular Checks: After heavy snowfall, check your roof for signs of ice dams. The sooner you spot them, the easier they are to manage.

Safely Removing Ice Dams with a Roof Rake

Removing ice dams safely is crucial to avoid damage to your roof and injury to yourself. Here’s how to do it:

Use the Right Roof Rake

  • Choose a Roof Rake with Rollers: These are designed to protect your shingles while you rake.
  • Non-Metal Heads: Use a rake with a non-metal head to avoid scraping or damaging the roof surface.

Start from the Edge

  • Clear Snow First: Before tackling the ice, use your roof rake to remove as much snow as possible from the edge of the roof.
  • Pull, Don’t Push: Gently pull the rake towards you to avoid pushing snow and ice further up the roof.

Safe Ice Removal Techniques

Direct ice removal requires care and the right techniques. Here’s how to do it safely:

Hot Water Method

  • Use Hot Water: Fill a spray bottle with hot water and gently spray the ice dam to melt it gradually.
  • Work in Sections: Don’t try to melt the entire dam at once. Focus on small sections to control the process better.

Calcium Chloride Socks

  • Fill Socks with Calcium Chloride: Use old socks or pantyhose filled with calcium chloride to melt the ice.
  • Lay Across the Dam: Place the filled socks vertically across the ice dam to create a channel for the water to flow off the roof.

Knowing When to Call a Professional

Sometimes, it’s best to call in the experts. Here’s when to seek professional help:

Severe Ice Dams

  • Large Ice Dams: If the ice dam is too large or widespread, it’s safer to let professionals handle it.
  • Persistent Issues: If ice dams keep forming despite your efforts, there might be underlying issues that need professional assessment.

Roof Safety Concerns

  • Steep Roofs: If your roof is too steep or difficult to access, don’t risk injury. Call a professional.
  • Damage to Roof: If there are signs of roof damage or you’re unsure about safely removing the ice, get expert help.

Extra Tips for Ice Dam Prevention

  • Improve Insulation: Proper insulation in your attic can prevent the heat that causes ice dams.
  • Ventilation: Ensure your attic is well-ventilated to keep the roof cold and prevent melting snow from refreezing.
  • Regular Maintenance: Keep your gutters clean and free of debris to allow proper water drainage.

By following these steps and knowing when to call for help, you can effectively manage and prevent ice dams using a roof rake. Remember, safety and prevention are key to protecting your home during winter.

Conclusion

Taking care of your roof during winter can seem daunting, but with the right tools and techniques, it’s totally manageable. Regularly using a roof rake, staying alert for potential issues, and knowing when to call in the pros will keep your roof in great shape and your home safe.

Don’t let ice dams and heavy snow catch you off guard this winter. Get your roof rake ready, follow these tips, and enjoy a worry-free season!